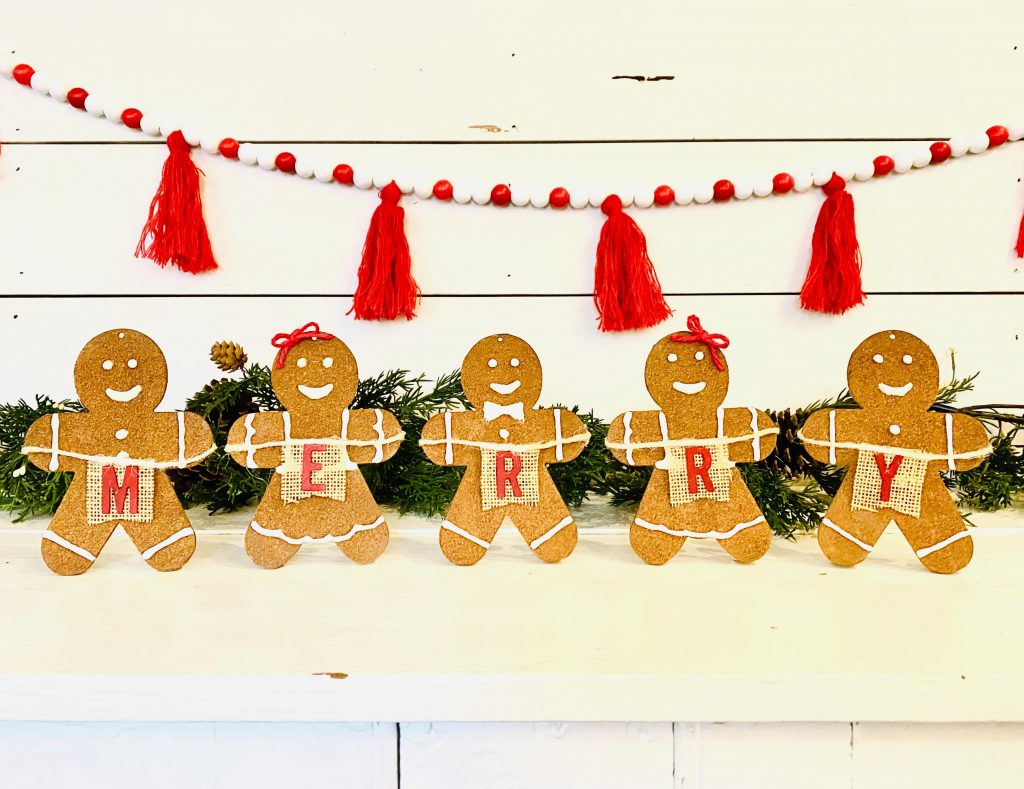
Hi everybody! Recently I did a super cute LIVE craft of my MERRY Gingerbread people. In that LIVE, I showed how to make DIY Puffy Paint, which was wonderful for that craft but also is very versatile and can be used for many different things! This blog is going to teach you all how to make that DIY puffy paint, and also give some photo inspiration of a few ways I have used it.
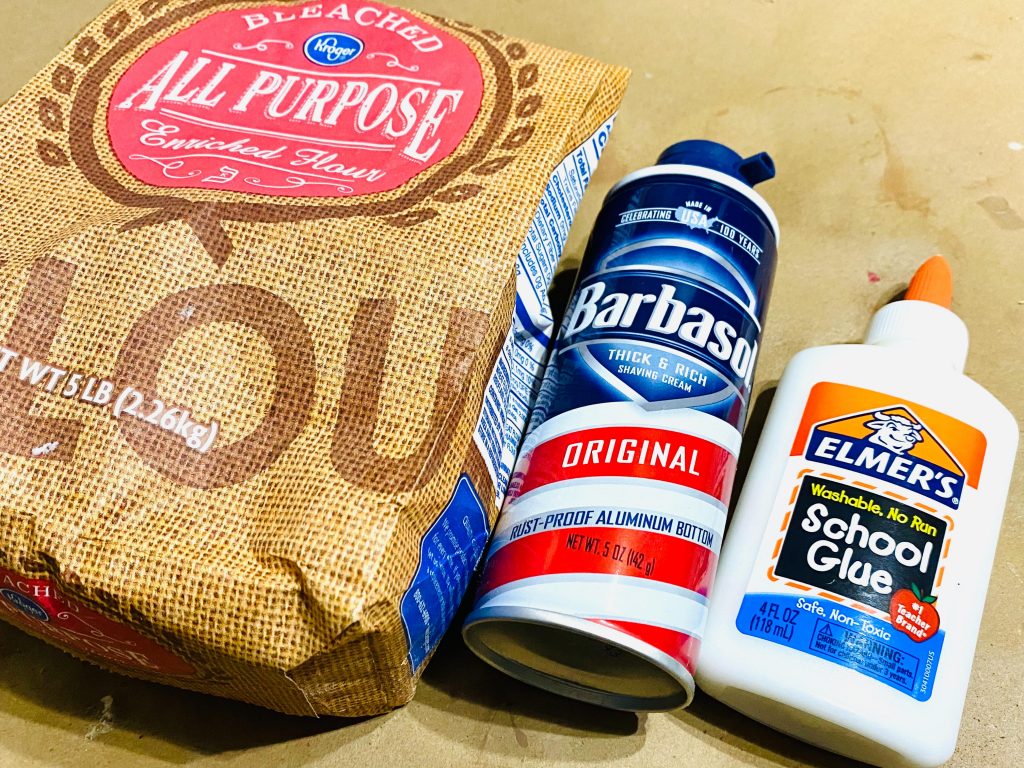
The materials list is super short and sweet, another great thing about this DIY! What you’ll need….
- any flour you may have, 1/4 of a cup
- shaving cream, 3/4 of a cup
- school glue, 1/4 of a cup (I have only used Elmer’s, so you may need to slightly adjust the recipe if not using Elmer’s)
Combine all of the ingredients and mix! You should end up with a sticky, cool-whip type of texture. If it is TOO thick, add a little bit more glue and if it is TOO thing add more flour until you get it how you want it!
Add it into a squeezy bottle and frost your cookies. If you need to touch up an area you can use a BBQ skewer to fix mistakes.
Let dry for 24 hours to let it fully set.
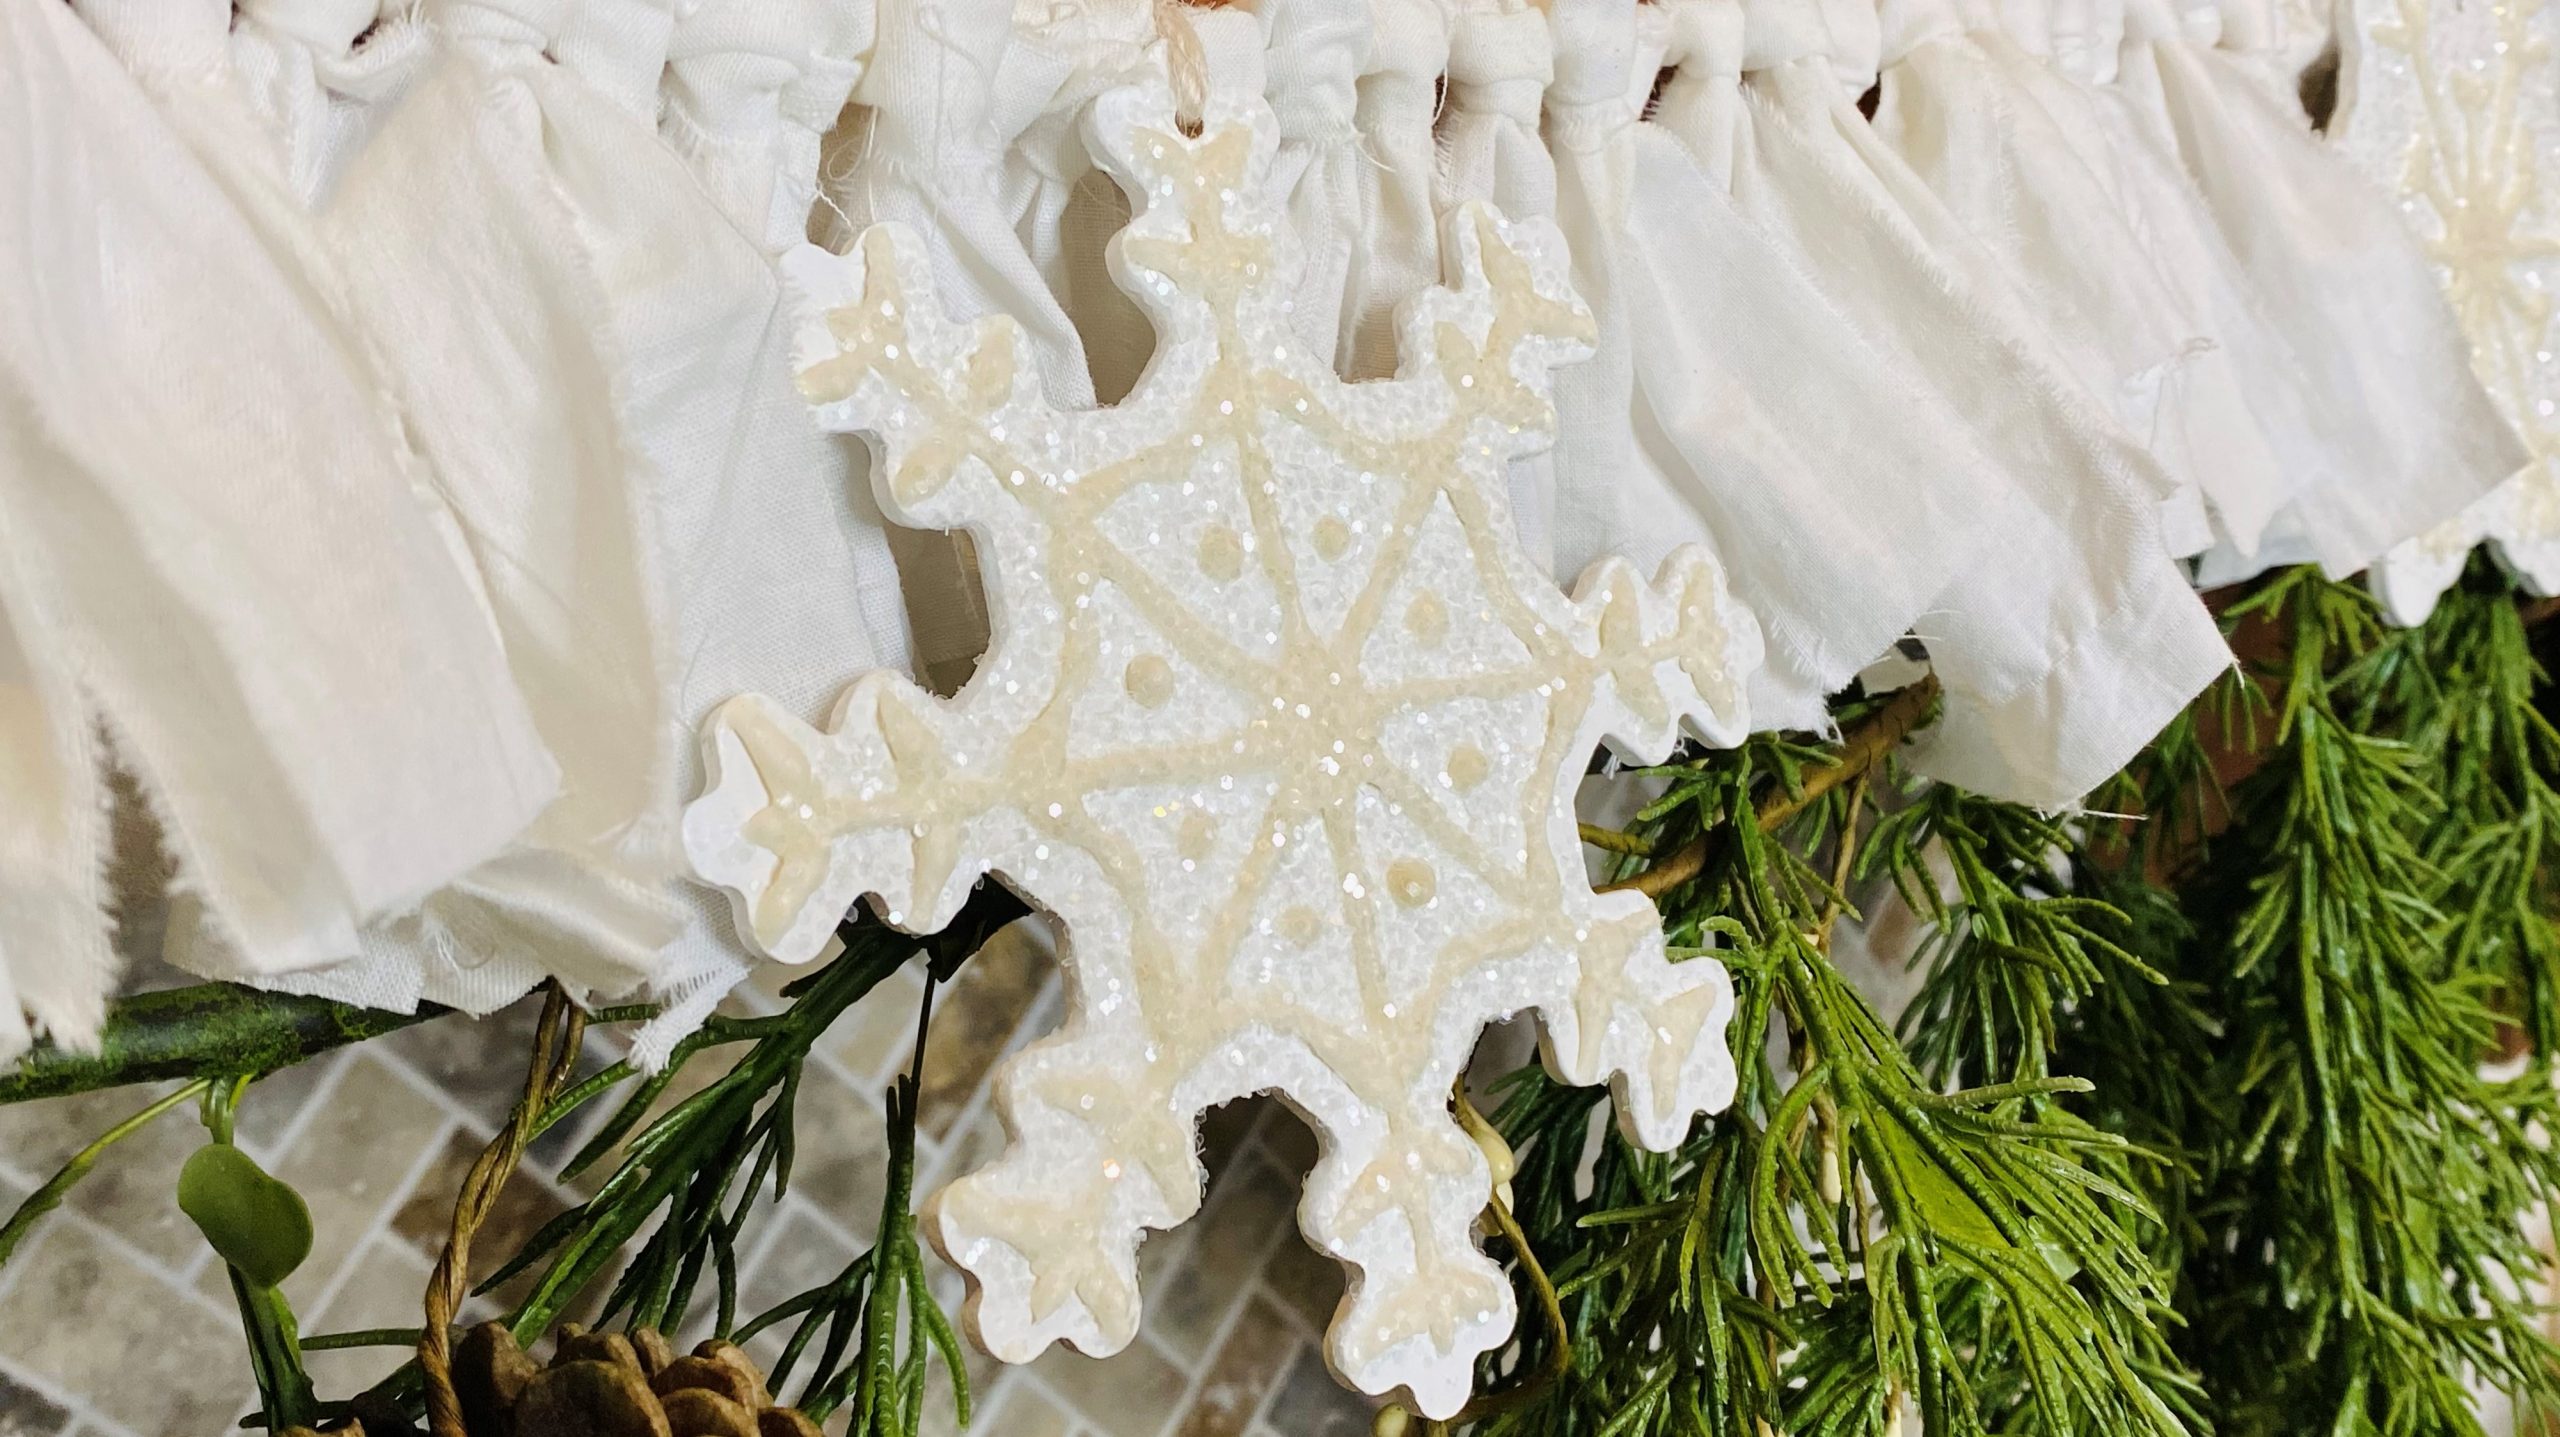
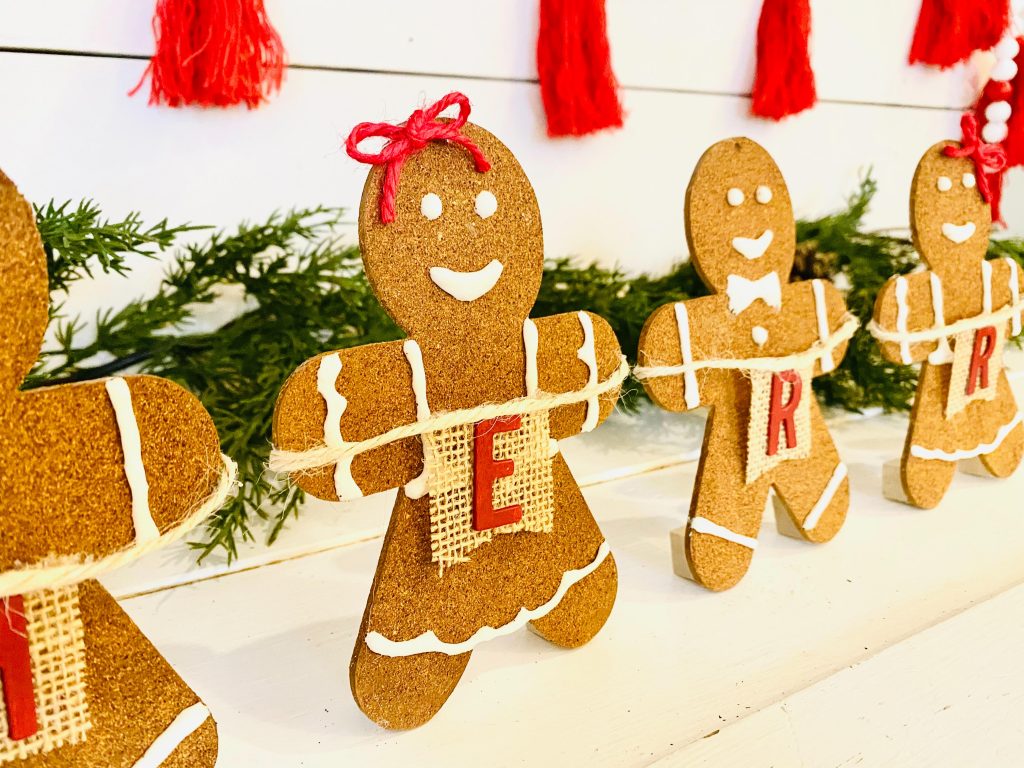
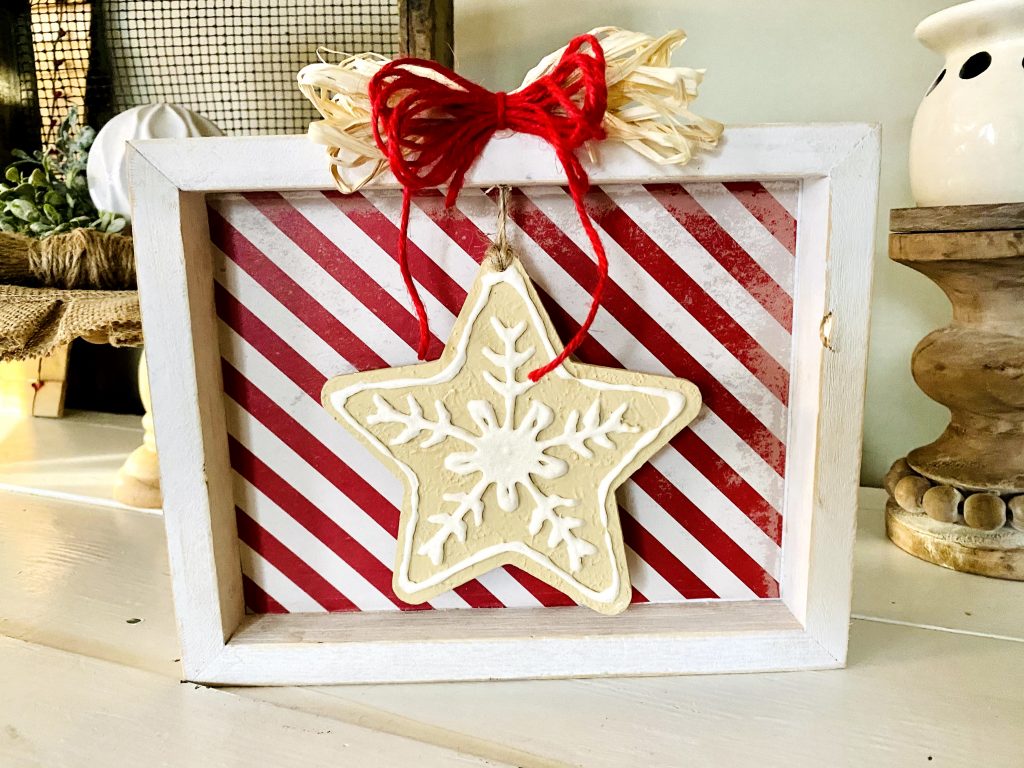
I think that this puffy paint can be used for just so many different things! Most recently, I made my gingerbread people and used this to look like frosting. It totally worked and turned out so adorable!
I also have used this on my sugar cookie crafts and it always look so realistic, just like icing or frosting! This puffy paint can also be used to add texture or dimension to any basic craft, as a snowy type addition to a craft, and in many other ways! It is super versatile and I hope you try this hack out and share with us what you make using it!
As always, happy crafting and happy holidays!
With love,
Kristy
Kristy’s Craft Room <3