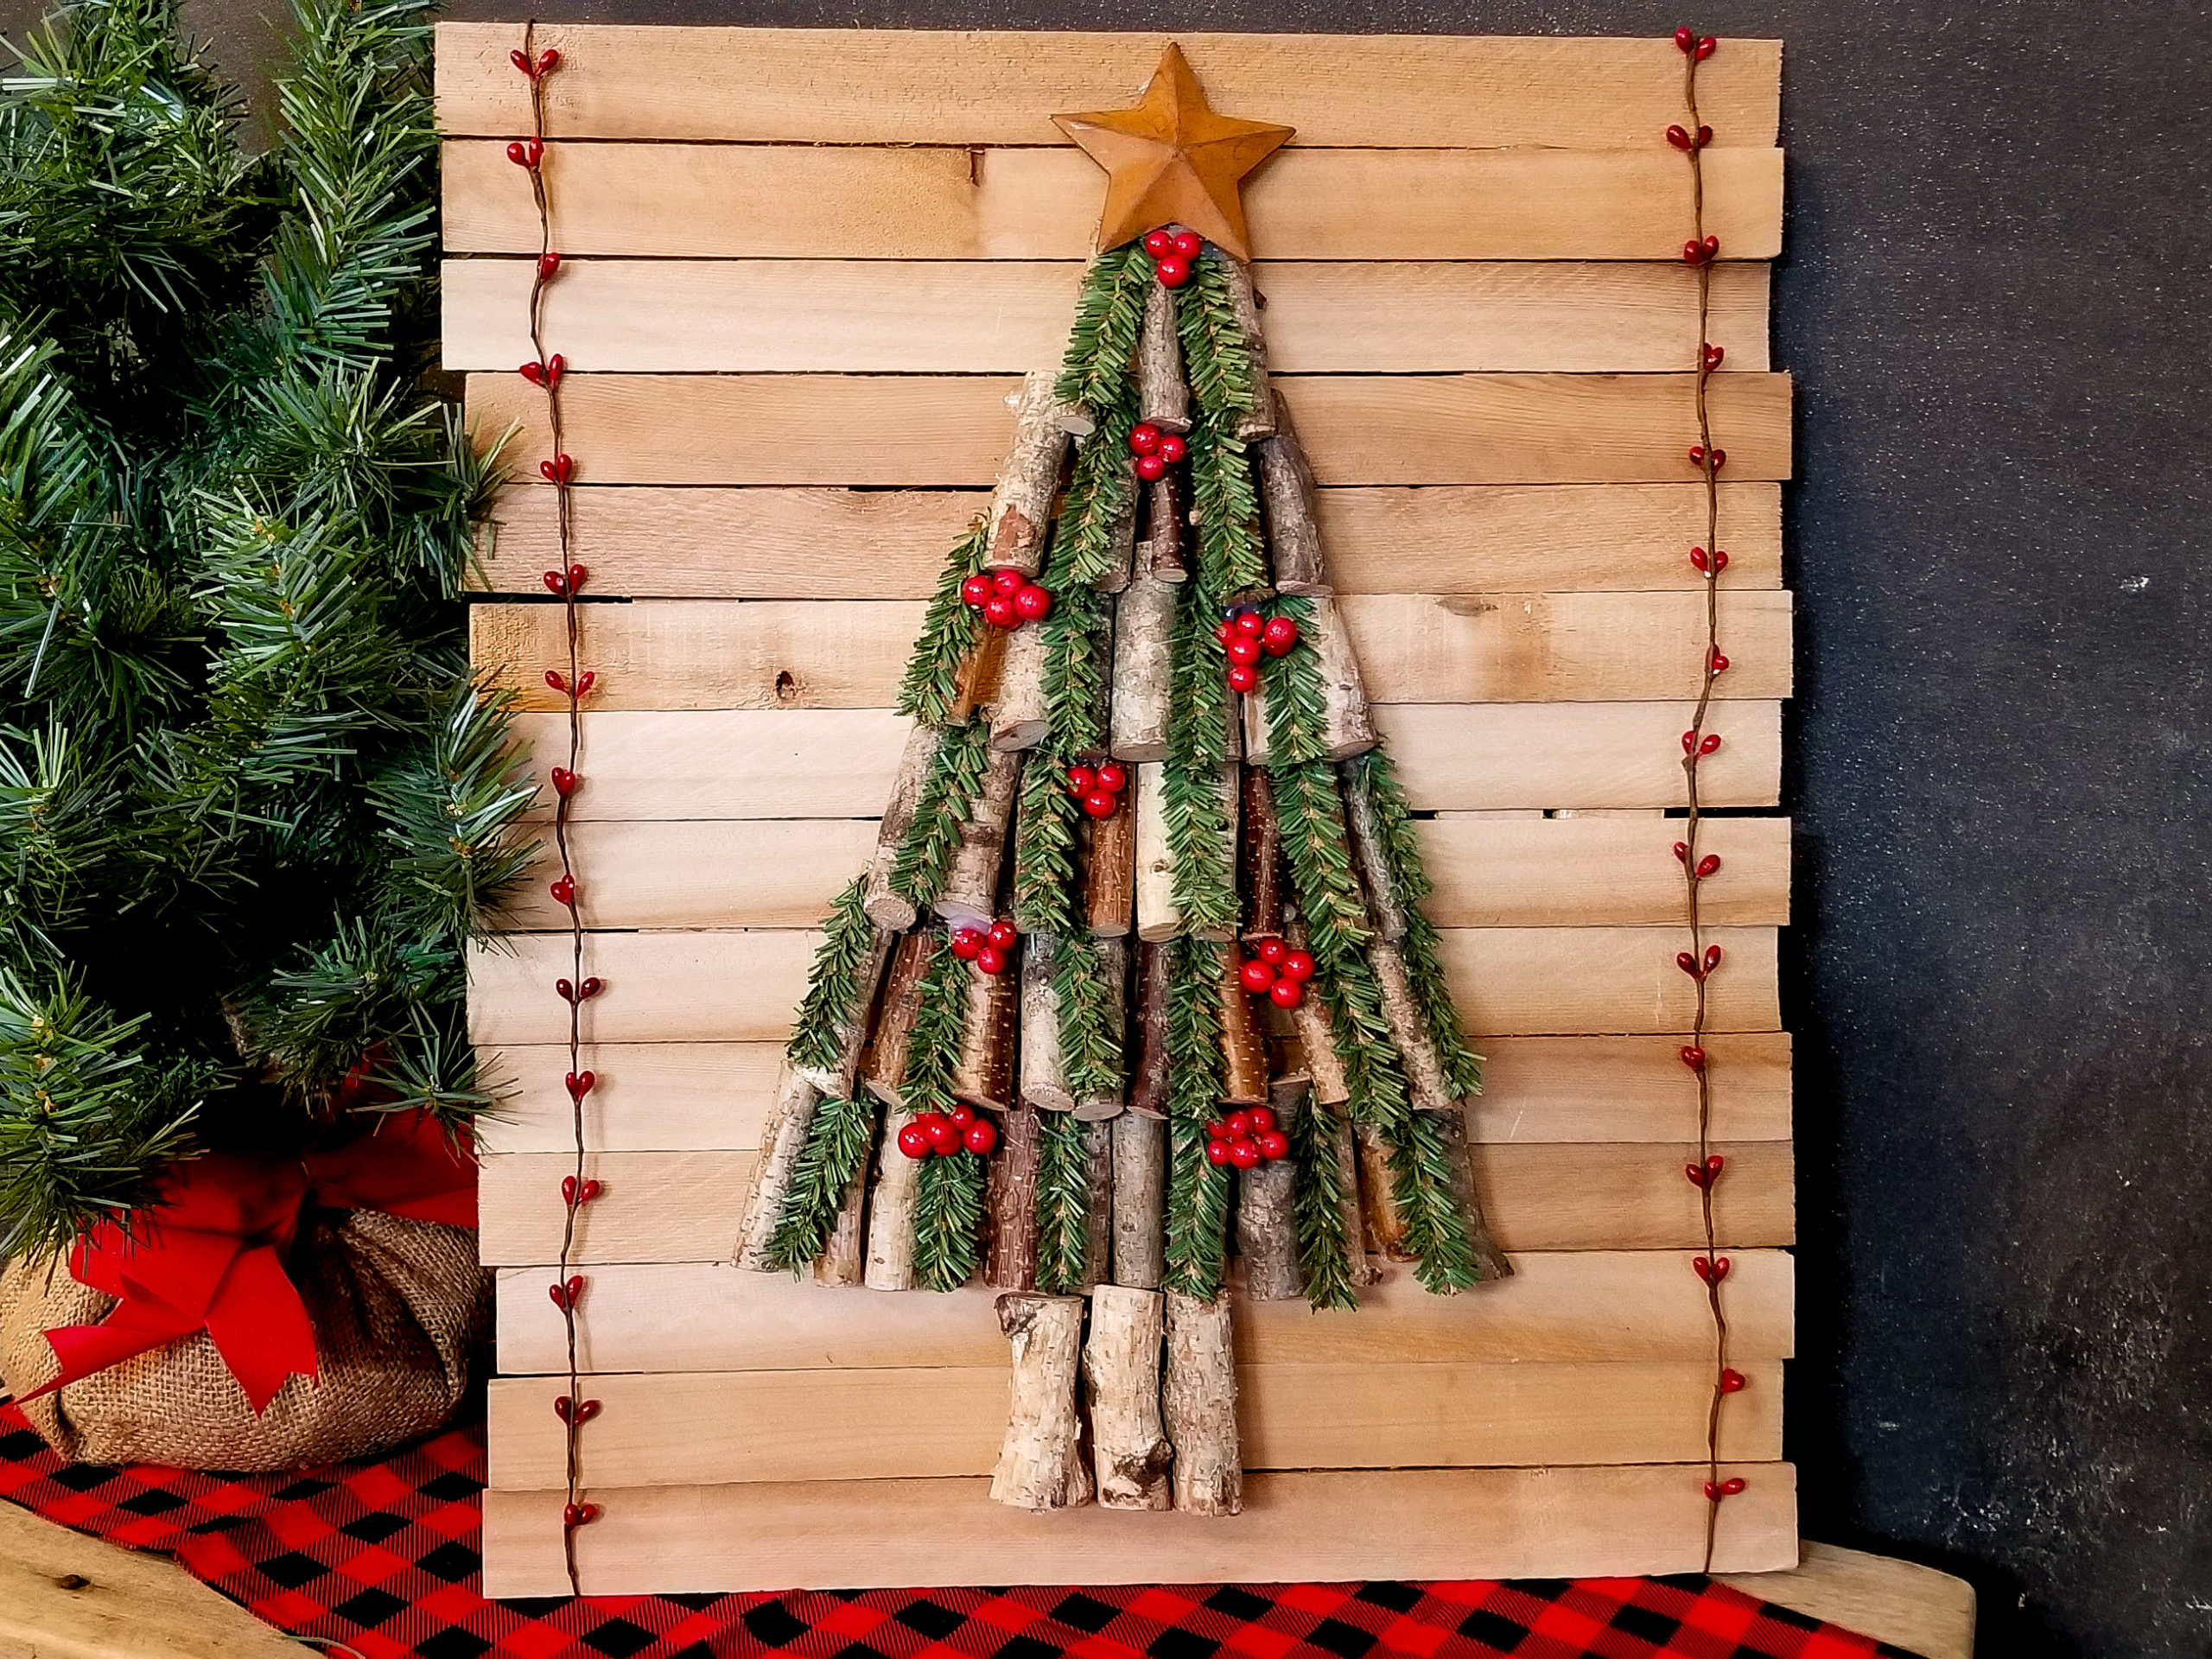

This beautiful tree has a very classy, high end feel to it, but is very budget friendly! This is created with construction shims, wood stems from Dollar Tree and garland ties that can be found at Dollar Tree ans many craft stores!
To see the full video tutorial click on the link at the bottom of this page.

Here is what you will need for this tree
- Large construction shims, Home Depot
- 2 Bags of wood stems, Dollar Tree
- Garland Ties. Dollar Tree or Hobby Lobby
- Holly Berry Sprigs, Dollar Tree
- Gold Metal Star, Hobby Lobby
- Berry Garland, Hobby Lobby
- Hot Glue and Glue Sticks
- Side cutters or cutting to to cut Garland Ties
- Twine (optional)
- Wood beads (optional)

The first thing you will need to do is build your frame. To do this I used the large construction shims. I bought mine at Home Depot for $4.98, I only used about half the package. I used 14 for the face of the frame and 4 for the back braces of the frame. First you will lay out your 4 back braces, two on each side staggered. Now you will lay your 14 frame pieces across the back braces staggering them so they don’t line up perfectly. Make sure your braces come to the edge of your frame. Lift one frame piece at a time and hot glue it to each of the back brace pieces. For this step it may be helpful for you to watch the video tutorial at the bottom of this page.


Now that your frame is complete you can start building your tree. It helps to lay out your wood stems to get an idea of your spacing before you start gluing them down. You will use 2-3 for the trunk of your tree. You will start by gluing those in place. Next you will lay out and glue your bottom row. You will want to slightly angle out he bottom of your wood stems out to help you get the tree shape

When you get to the next row up you will overlap this row over the bottom row. You will continue this all the way to the top of your tree.


Once you have all your wood stems glued in place in each row, you will cut some pieces of garland tied to about 2 inches each and use them to fill in some of the spaces between your wood stems. Hot glue them in place.

Now you can cut small clusters off your berry prigs and glue them onto your tree.


I embellished to top of my tree with a gold star ornament from Hobby Lobby, but you can use any type of star you like.

I also added a berry garland to each side of my frame. I Got this at Hobby Lobby. You could also use red ribbon, twine or even yarn for this.


You can add an optional hanger if you wish. I used twine and wood beads from Hobby Lobby. I cut a long piece of twine, spaced out my wood beads and tied knots to hold them in place. I hot glued my twine hanger and later added a couple staples to hold it in place.
Your Farmhouse Christmas Tree is now complete! I hope you make one and it adds as much beauty to your home as mine does! If you would like to watch the full video tutorial click here. I you like this tutorial and would like to see more of my DIY creations click here to go yo my Facebook page. Be sure to click Follow while your there to become a part of my crafting family!
