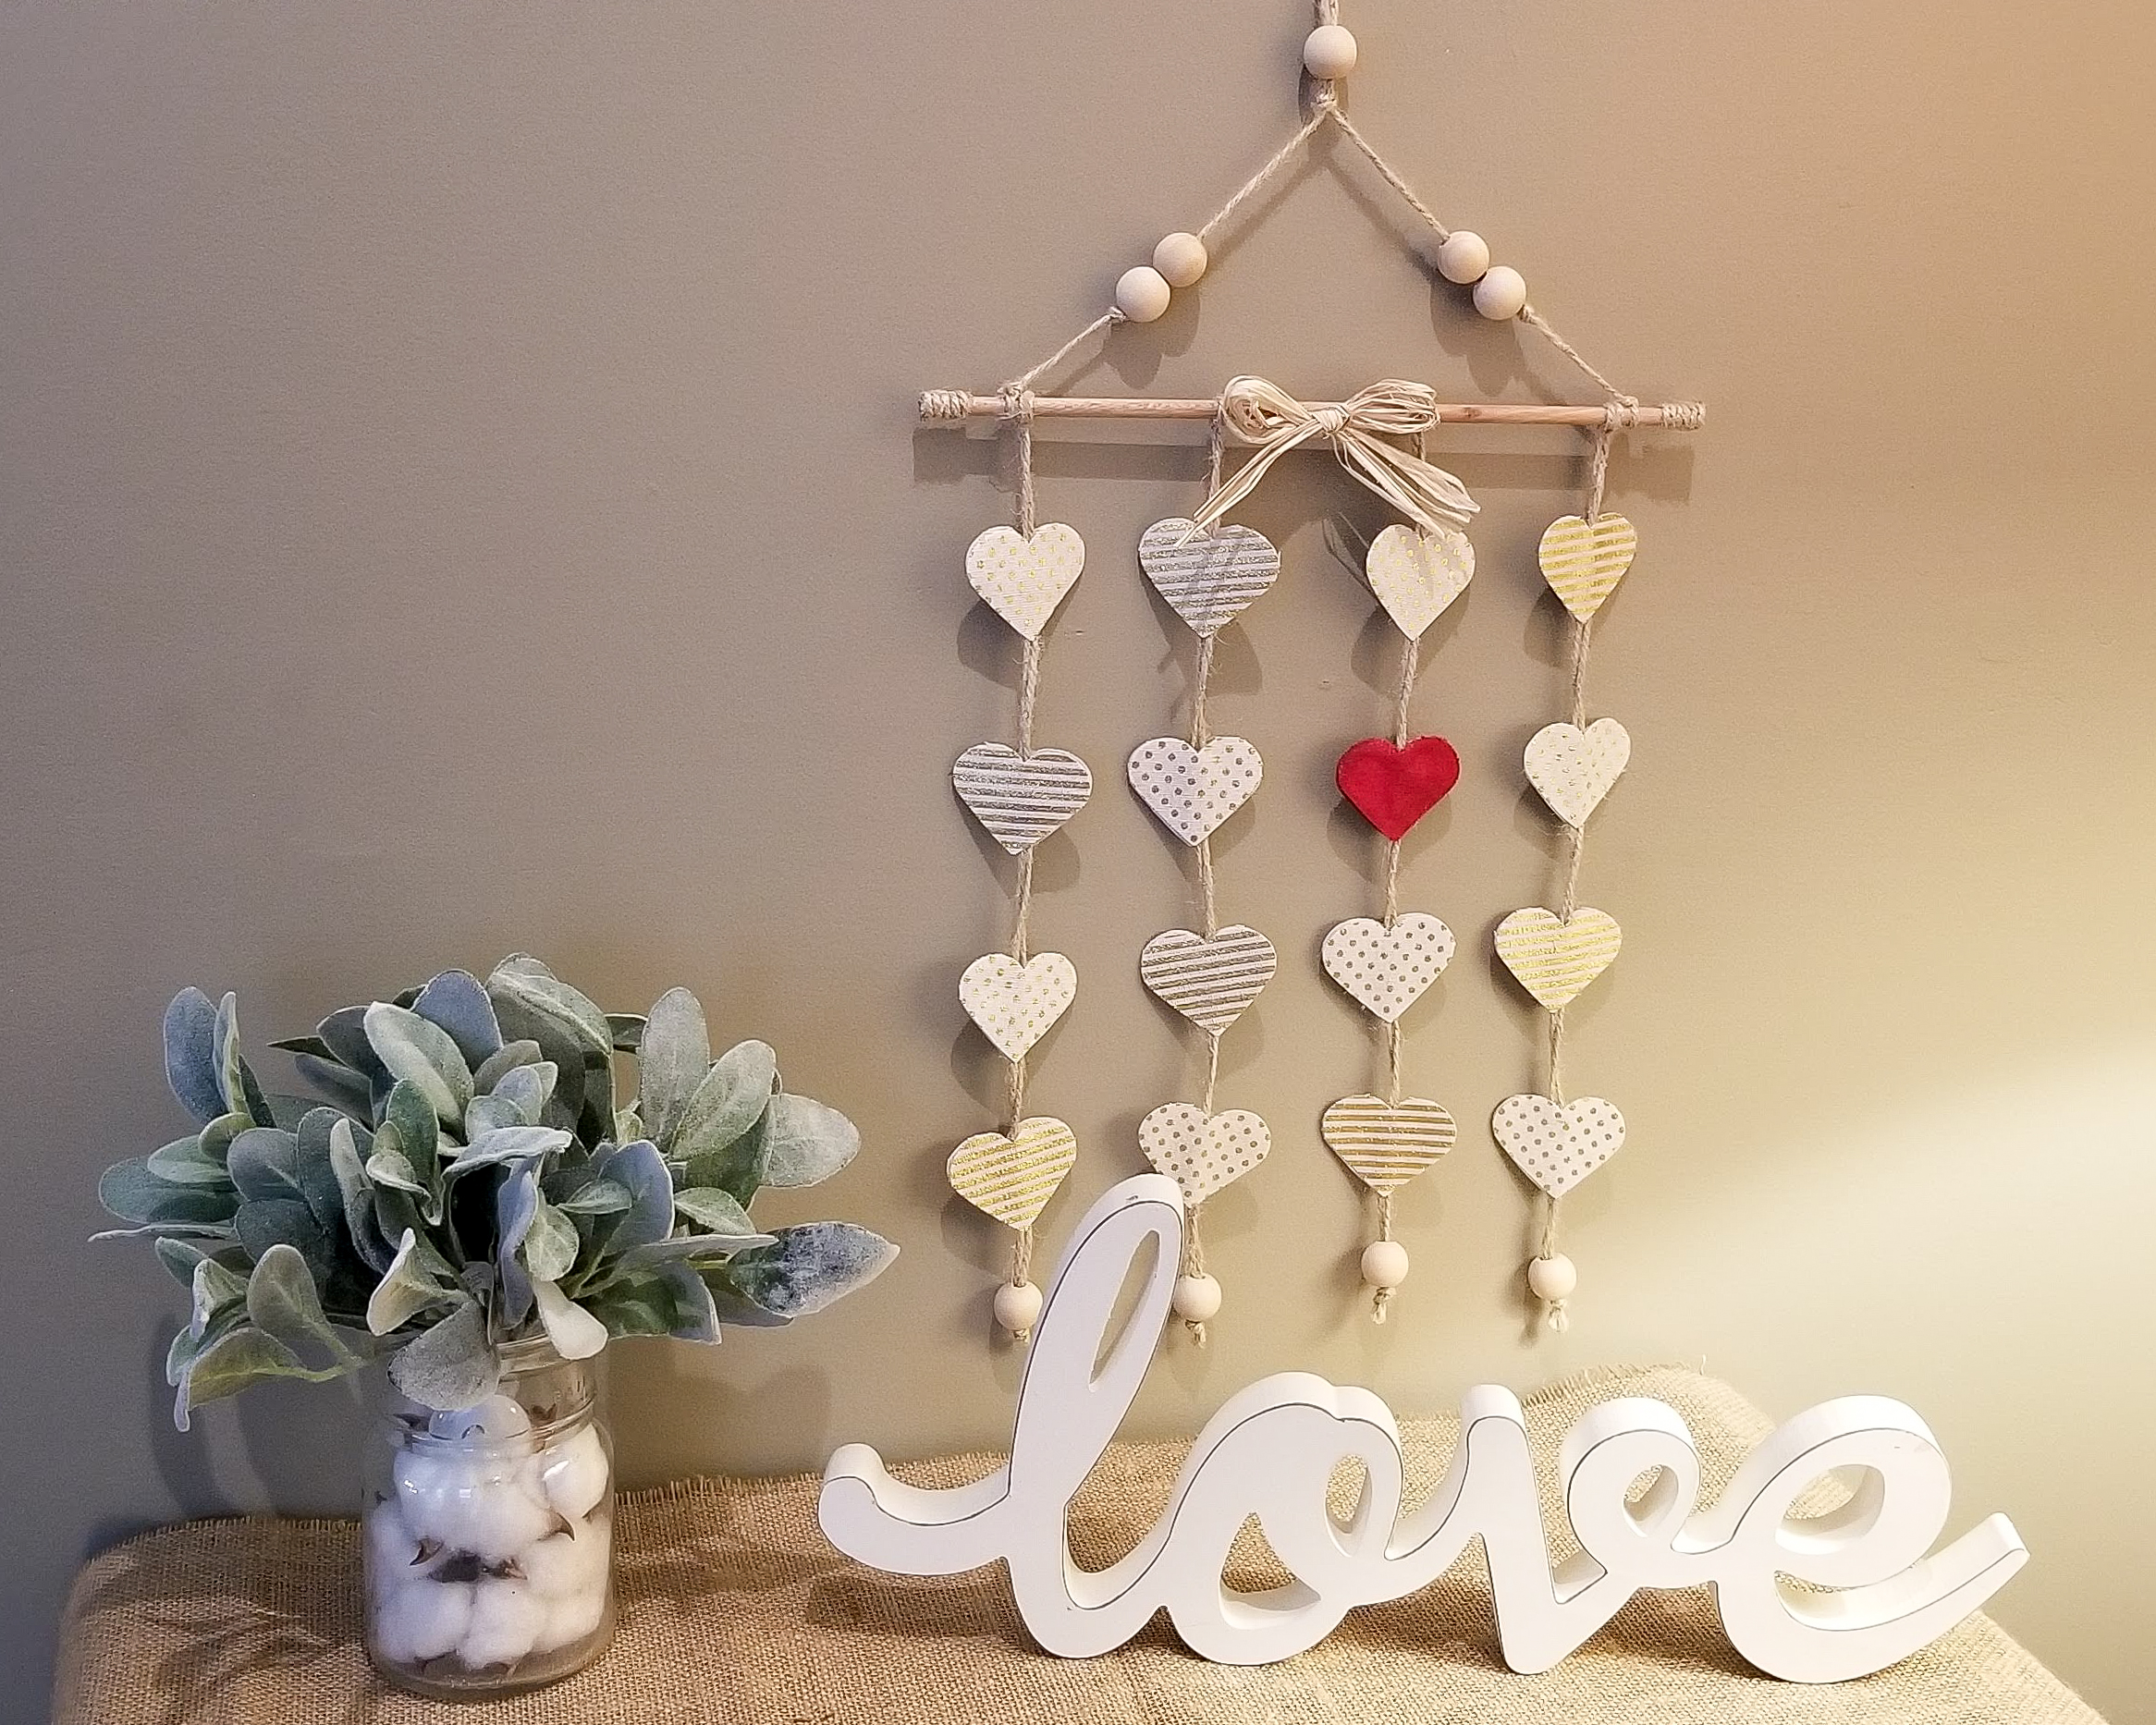

This fun little love craft perfectly represents the one true love in your life. I chose to make this to represent the one true love I have in life. There are many hearts out there in this big world we live in, but there’s one that is a little extra special and all mine. That is the heart of my soulmate, my husband that I chose for life. That is what the red heart represents. You can leave it simple and red like mine or you can add your and your soulmates initials, your soulmates name, a wedding date or any other significant date to your red heart. Personalize it any way you choose.
There’s a link to the live video tutorial at the bottom of this page, but remember I made some extra changes to this after the video that you can see in this typed tutorial.

Here’s what you’ll need to make yours.
- 12 inch Dowel Rod
- Twine
- 2 inch hearts
- wood beads
- Red paint
- Hot glue gun and glue sticks
- Scissors
- Paint brush
- Tape
- Ruler

The first thing you will do is cut 4 pieces of twine 36 inches long. Folded in half each piece will be 18 inches long.


Now with your twine pieces folded in half, tie a knot close to the end only leaving about 1/4 inch sticking out.


Slide a wood bead onto each of your four pieces of twine. I used a 3/4 inch wood bead, but you can use any size you have that’s close.


You will now lay your twine under your wood dowel and pull your bead end through your looped end. This will fasten your twine to your dowel. Do this with all four of your pieces of twine.


You will space your first two twine pieces 1 1/2 inches from the ends of your dowel and secure them in place with a small dot of hot glue. Your second two twine pieces will be glued 4 1/2 inches from the ends.


Now that you have all of your twine pieces hanging from your dowel you will tape your dowel and each end of your twine near the bead to your work surface. This will help keep everything in place to line up your hearts.

It’s time to work on your hearts. I used a pack of hearts I found at Hobby Lobby. They are a canvas material, some with stripes and some with polka dots. You can use the same hearts as me or make your own out of paper or stiff material. For the spacing dimensions I give you, you will want to make sure you use 2 inch hearts though. First thing you will do is paint two of your hearts red. Set this heart aside to dry.


I started with my piece of twine on the right side. Lay a ruler next to the twine. Place your first heart two inches down from your dowel. You will slide your first heart face down under your twine. Use hot glue to secure it to your twine. Put a bead of hot glue all the way around the outside edge of your heart and place your second heart on top face up. You will be sandwiching the twine between your two heart pieces.
Repeat the last step on your next heart 5 inches down from your dowel. Then your next one 8 inches down from your dowel and your last heart 11 inches down. So your hearts will be placed at 2, 5, 8 and 11 inches down from the dowel rod. See photos below.


You will repeat this step in the next rows alternating which design you start with and placing the red heart in the second from last row to the right and second row down.


Once all your hearts are in place you will work on your hanger. You will see that my hanger here is different then the one in the video tutorial. I decided I didn’t like that one… yes, I change my mind sometimes… For my new hanger I started with a 30 inch piece of twine. Fold it in half and tie a knot about a inch and a half down from the folded end.

Slide two of your beads on each end of your twine and tie a know about 4 inches down from your original knot.

Now tie the ends of your twine evenly to the outside of your end pieces of twine on your dowel rod. Trim off any excess ends of your twine.

You’ll finish off your dowel rod by hot gluing a little twine around the ends of your dowel.

I added a little raffia bow to the center of my dowel because…. well, because….why not!

One last touch I added was to slip one last wood bead over the top loop of my hanger. Your One and Only Heart Hanger is now complete! If you would like to watch the full video tutorial click here. If you like this tutorial and would like to see more tutorials like this click here to go to my Facebook Page. Make sure to click on the Follow button while your there to be able to see future pretty things like this!

Hi, I’m going to try to make it after I get over the flu. It is really nice.
Oh I hope you feel better real soon! Have fun making it!!
Love the new look, with the beads placing <3
Thank you!
I love your crafting and I have done some of the crafts you have shown us and have sprinkled the love to my crafting friends. Thank you ♥️♥️
Awe thank you! I’m happy to hear you have made some of the crafts from my page! I truly appreciate you sprinkling the love too!
Love it
Thank you Tammy!
Hi Kristy, I wasn’t able to watch this one being made. But I really like it, you always make such beautiful things…
Thank you! ❤