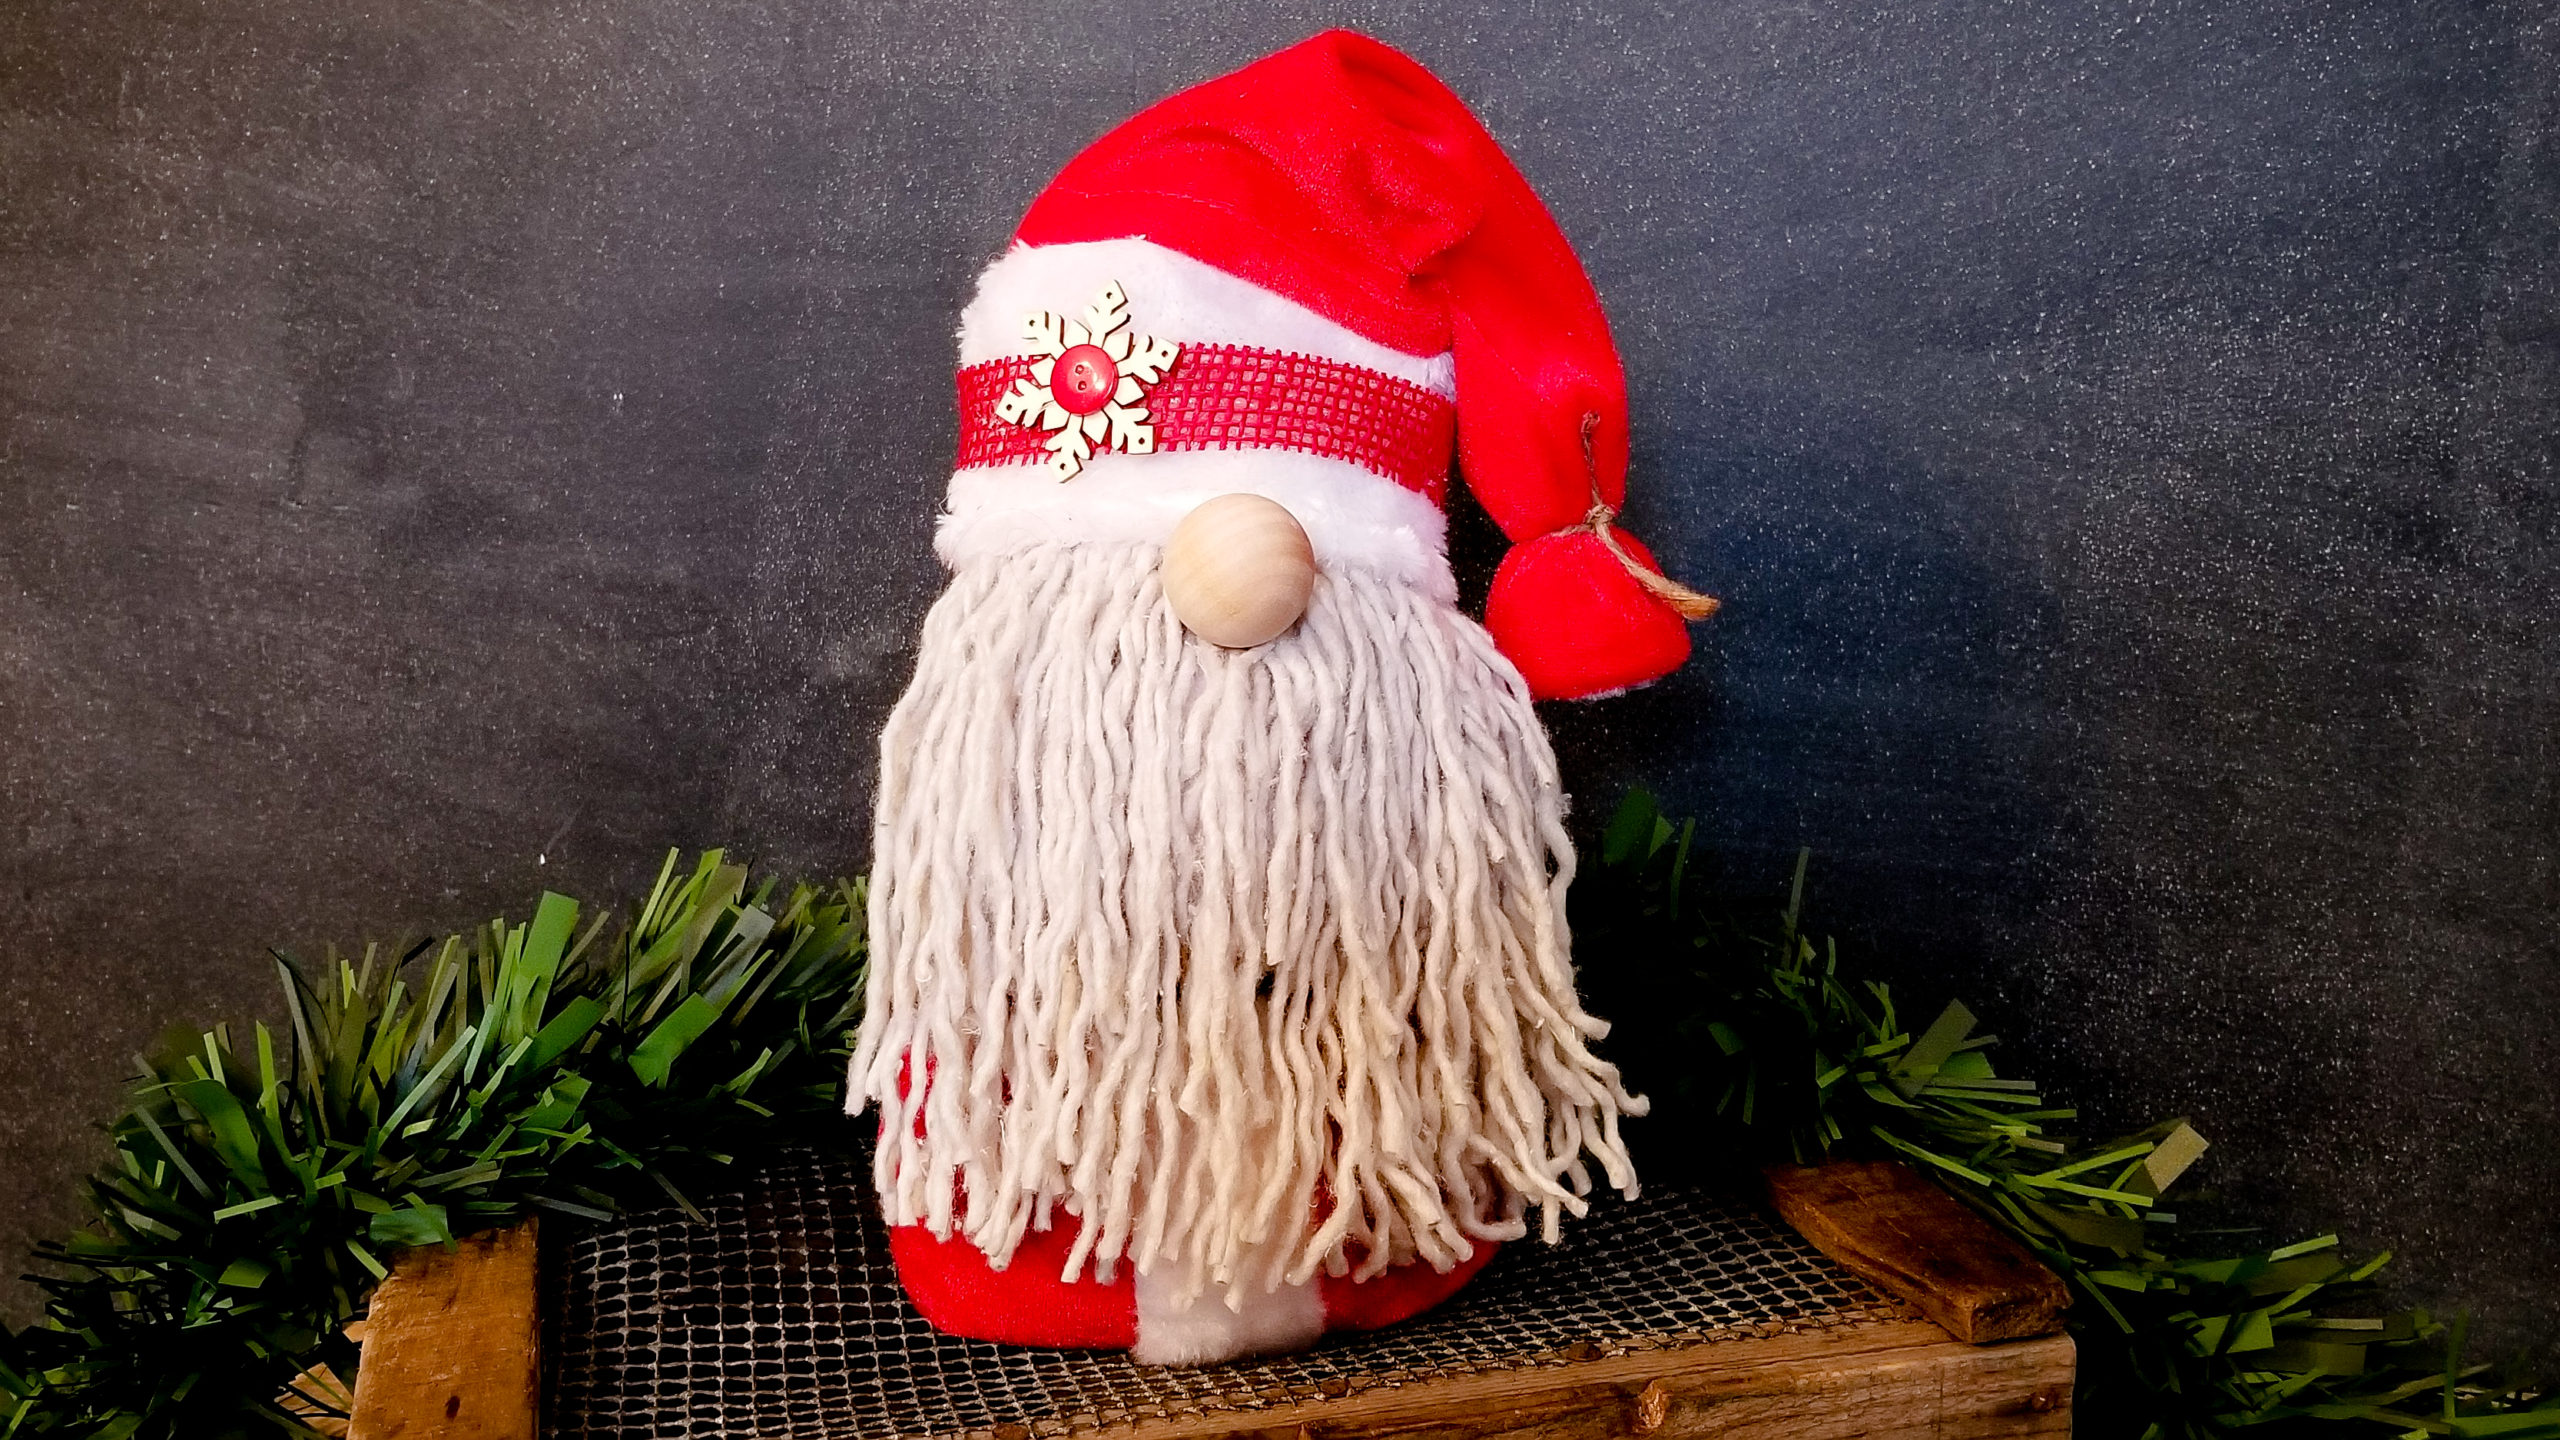
This plump little Santa Gnome can be created with all things Dollar Tree! Can you believe he is made from two wine gift bags, rice and a mop head! In this tutorial I am going to break down the super easy instructions step by step for you.

To see a full video tutorial click on the link at the bottom of this page.

Here’s what you will need to make this Santa Gnome.
- 2 Santa wine bottle fabric gift bags, Dollar Tree
- 1 1/2 bags of rice,Dollar Tree
- 1 mop head, Dollar Tree
- Red burlap ribbon, Dollar Tree
- 1 snowflake wood sticker, Dollar Tree
- 1 Button, optional
- Twine or yarn, Dollar Tree
- 1 small bulb ornament, Dollar Tree or large wood bead, Michael’s
- Scissors
- Hot glue gun and glue sticks

The first thing you will do is cut the gold ribbon tie off the top of your first wine bag. Now fill this wine bag with rice up to the top edge of the red fabric.


Use hot glue to seal the top edges of your bag shut. Then you will turn in the top corners and hot glue them.

You are ready to create your beard. To do this you will cut the mop rope pieces off of your mop head. I used less then half of my mop.


You will hot glue them across the entire front of your Santa Gnome where the red fabric meets the whit fabric. I added a second layer of mop rope to the center area for more fullness.

Once you are done gluing your beard on and your hot glue has cooled and set you can start separating your mop rope pieces.

Your beard will be quite long at this point. You can leave as is or trim it up like I did. I rounded the bottom of the beard and trimmed some pieces at different lengths to give it more dimension and texture.

Now set your Santa Gnome aside to work on his hat. I cut off the gold ribbon tie and the black belt.


Next I laid the hat flat on the table with the white strip facing up, folded the bottom corners in and use piece of twine to to hold it. I left about an inch on each end if the twine showing on the red side of the hat. You can also use yarn for this step.

Now with your hat laying red side up. You will cut a piece of red burlap to fit around the brim of your hat and cut it long ways about an inch wide. Hot glue this burlap ribbon around the center of the white on your hat brim.


You can embellish your hat with whatever you like, but I used a wood snowflake sticker from Dollar Tree. I hot glued it offset to one side on the burlap ribbon, I wanted a little pop of red so I hot glued a red button to the center of the snowflake.

Place your hat on top of your gnome body overlapping the top edge of his beard. Use a few small dabs of glue to secure your hat to your gnome.

I finished off my Santa Gnome with his nose. I used a large wood bead that I got at Michael’s, but you could also use a small Christmas bulb or a large button.
Your plump little Santa Gnome is now complete! I just couldn’t be more in love with this little guy! I hope you make your own to love too! To watch the full video tutorial click here. If you like this tutorial and want to see more of my DIY’s click here to go to my Facebook page. Remember to hit the Follow Button while your there!

