
This Love sign was created with things I already had around my house and in my stash of of craft supplies. You probably have most of the things needed for this sign too. In this tutorial I will show you what I used and suggest other options that will work as well.

What you will need to make yours the way I did.
- Scrap wood, 1″ x 8″ x 16″
- Wood construction shims
- 4″ heart shape
- Acrylic paint, brown, white and red
- Twine
- Wood beads
- Ribbon
- Paint brush
- Hot glue gun and glue sticks
- Scissors
- Side cutters

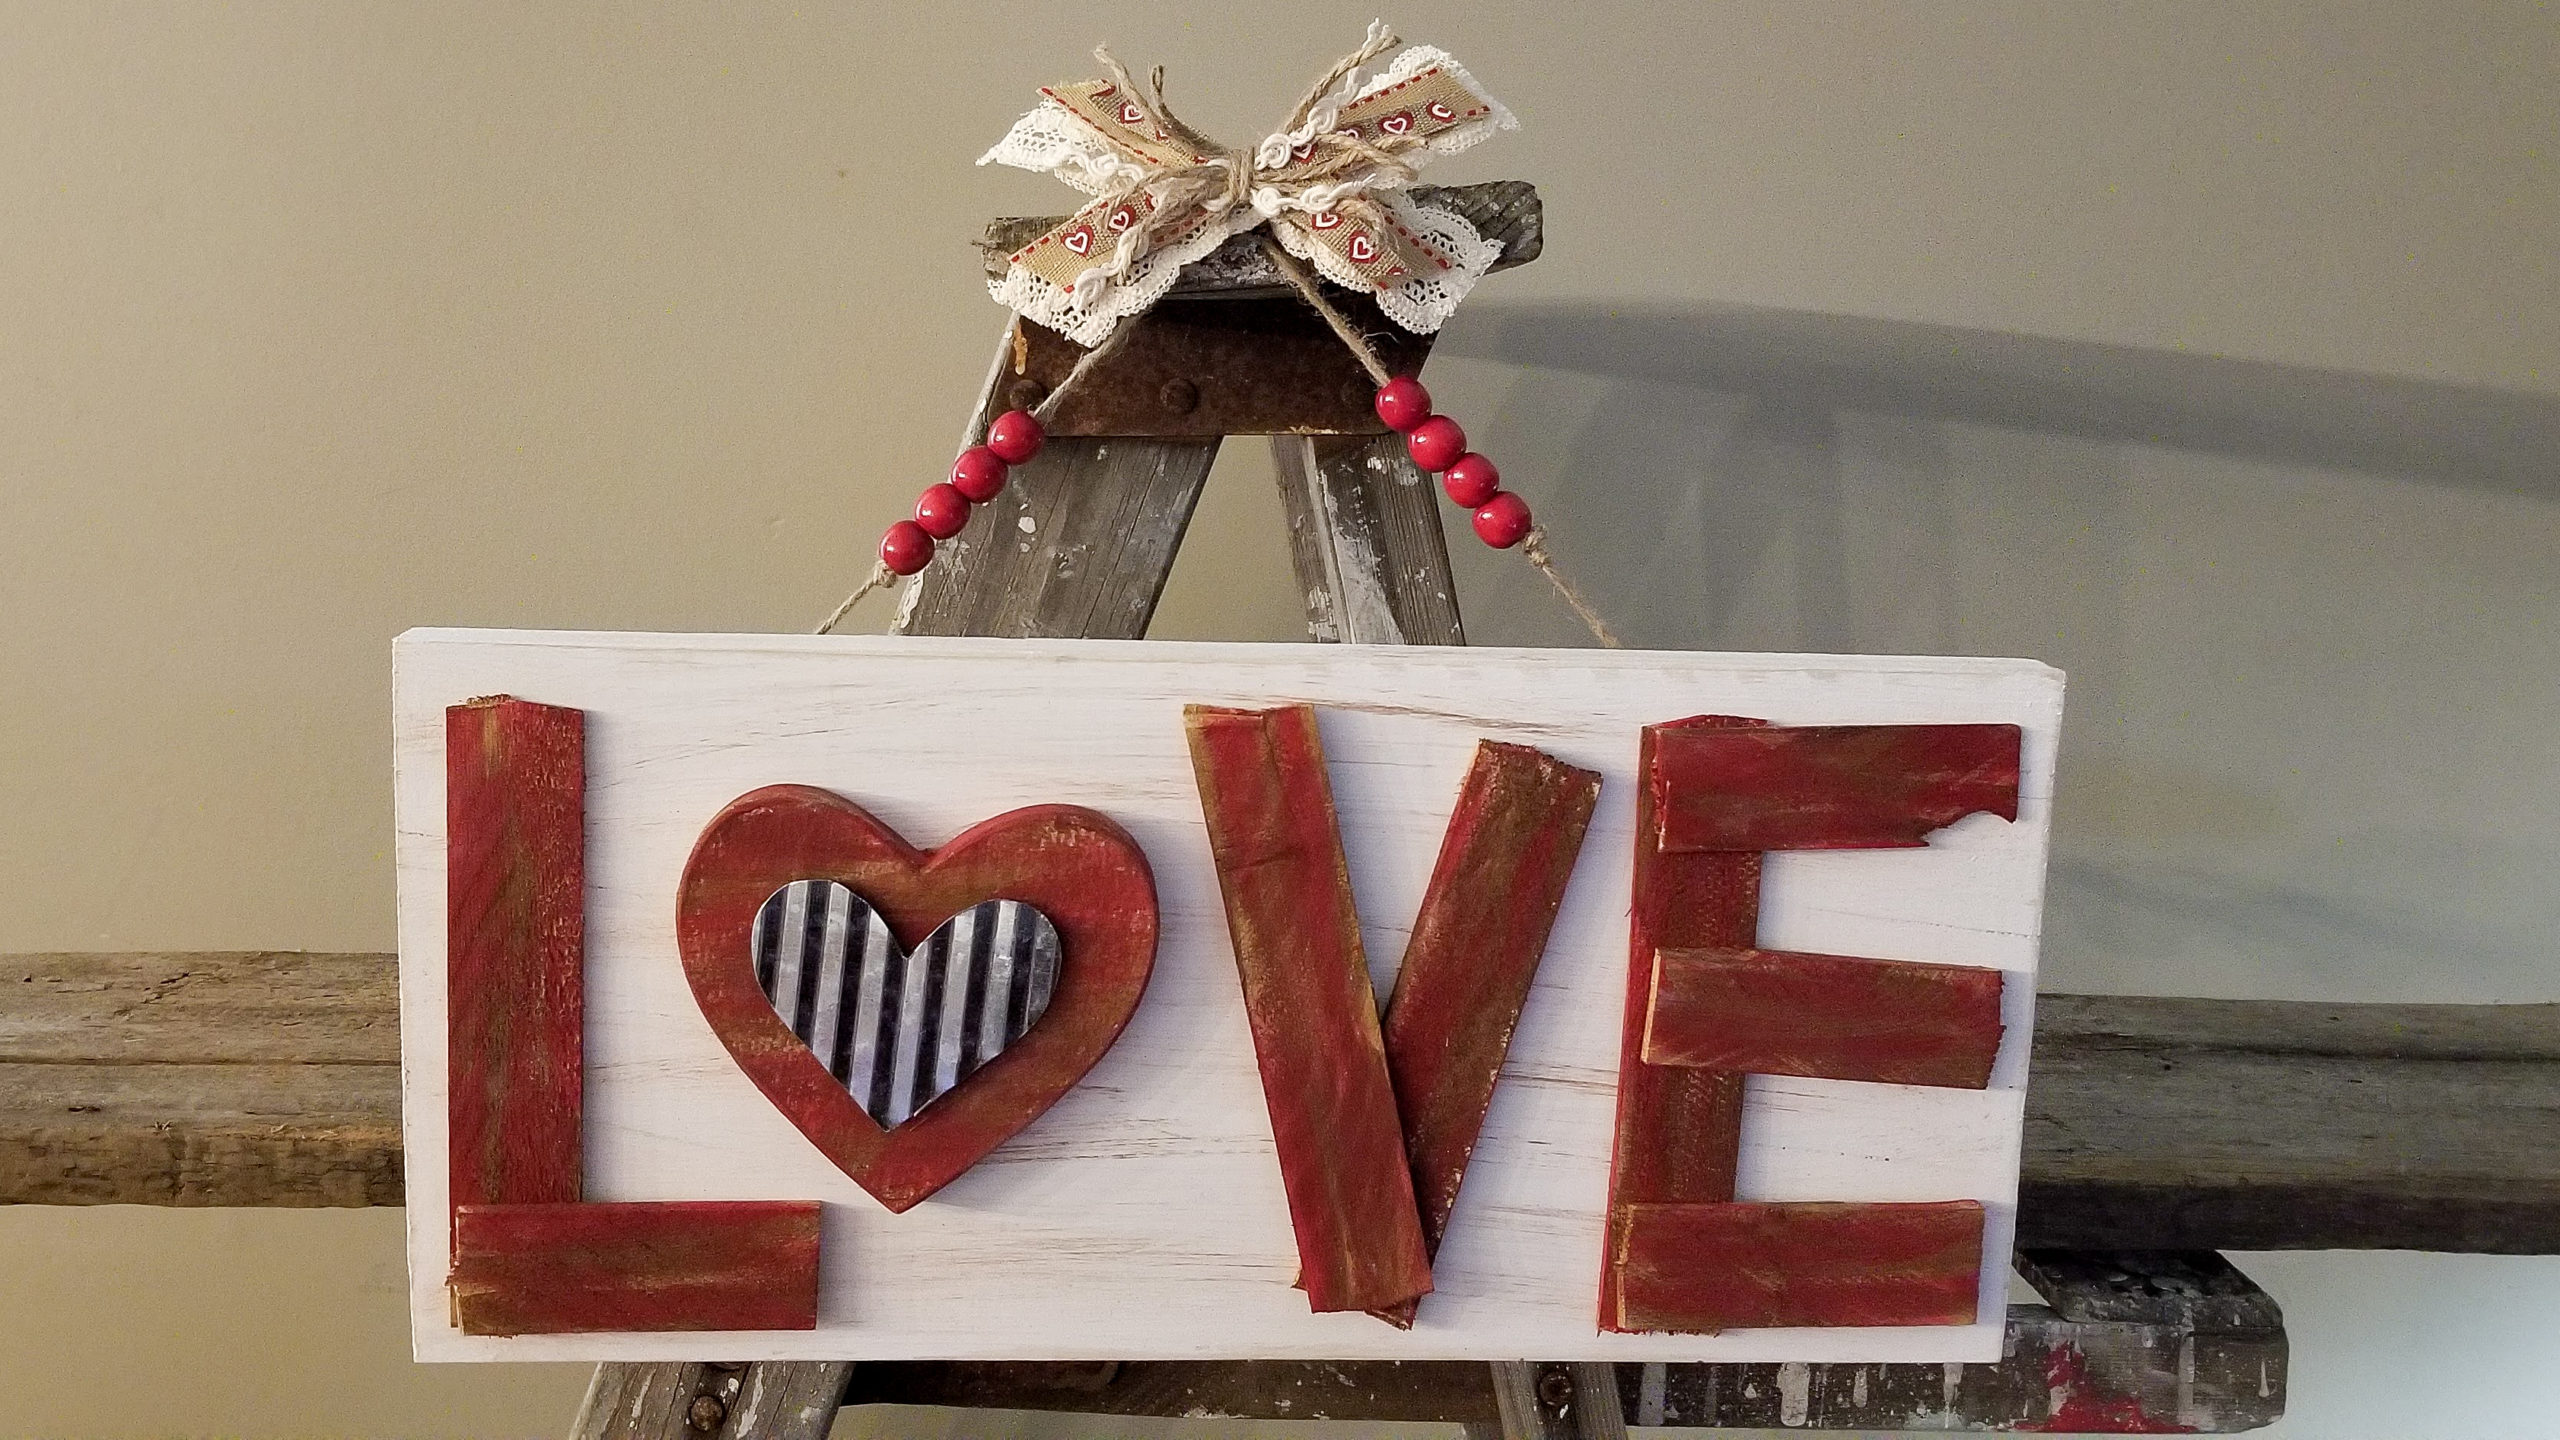
The first thing you will do is paint your large piece of scrap wood white. I used a left over 1″ x 8″ that was 16″ long. You can use the same or you can use any scrap wood you have or you can re-purpose an old sign board.

After the white paint dries you will dry brush some brown paint on your board.

If you choose you can add a bit more distressing by sanding your edges with a sanding block.


I used wood shims and a pair of side cutters to cut my shims to create the letters L, V and E. I used a 4″ cardboard heart I had left over from another craft. For the letters you can also use paint stir sticks, sticks or strips of cardboard or foam board. For the heart you can use cardboard or foam board. Cut and lay out your letters on your board for size.


You will now roughly paint your shims and heart with your brown acrylic paint.

Once your brown layer of paint is dry you will paint some red onto your letters and heart leaving some of your brown showing through.

You will now lay out your letters on your board spelling out LOVE. Hot glue them into place.


I added a galvanized metal heart on top of my cardboard heart. I took this off of a valentines sign I got at Dollar Tree. If you don’t have one of these you cans make one of my faux galvanized hearts by clicking here for the tutorial.

I added a hanger by cutting a piece of twine about 18 inches long. I tied a knot about 3 inches from the end and strung 8 red beads on it that I had left over from Christmas. You could paint any wood beads red for this. Tie another knot at the other end of your twine about 4 inches from the end.

You will use hot glue to temporarily fasten your hanger to the back of your sign then secure it more permanently with staples. To ensure your twine doesn’t slip out of your staples tie a knot below your staples.


I finished my hanger with a re-fabbed bow. I used a variety of lace, ribbon and twine. To make this bow layer your pieces of ribbon crisscrossing each layer. Start with the widest pieces on the bottom. Cut each layer a little shorter then the one below it. Tie your layers together with a piece of twine then trim the ends of your bow. Now tie your bow to the top of your hanger.
Your LOVE Sign is now complete! If you would like to watch the full video tutorial click here. If you like this tutorial and would like to see more like it check out my Facebook page by clicking here. If you like what you see, make sure to click on the Follow button while your there.
