
This adorable little Christmas Tree Forest was created from a $1 package of tree puzzles from Dollar General! This is a perfect example of high end crafting on a low budget!
Be sure to check out the full video tutorial at the bottom of this page.

First off gather your supplies, you will need the following things to make your own little Christmas Tree Forest.
- Wood Trees, $1 from Dollar General
- 4 small construction shims
- Scrapbook paper
- Mod Podge
- Twine
- Card stock
- Silver Acrylic Paint, I used FolkArt Silver Anniversary from Michael’s
- Faux Snow from Dollar Tree (optional)
- Sanding block
- foam nail file (optional)
- Paint brushes
- Hot glue gun and glue sticks
- Scissors


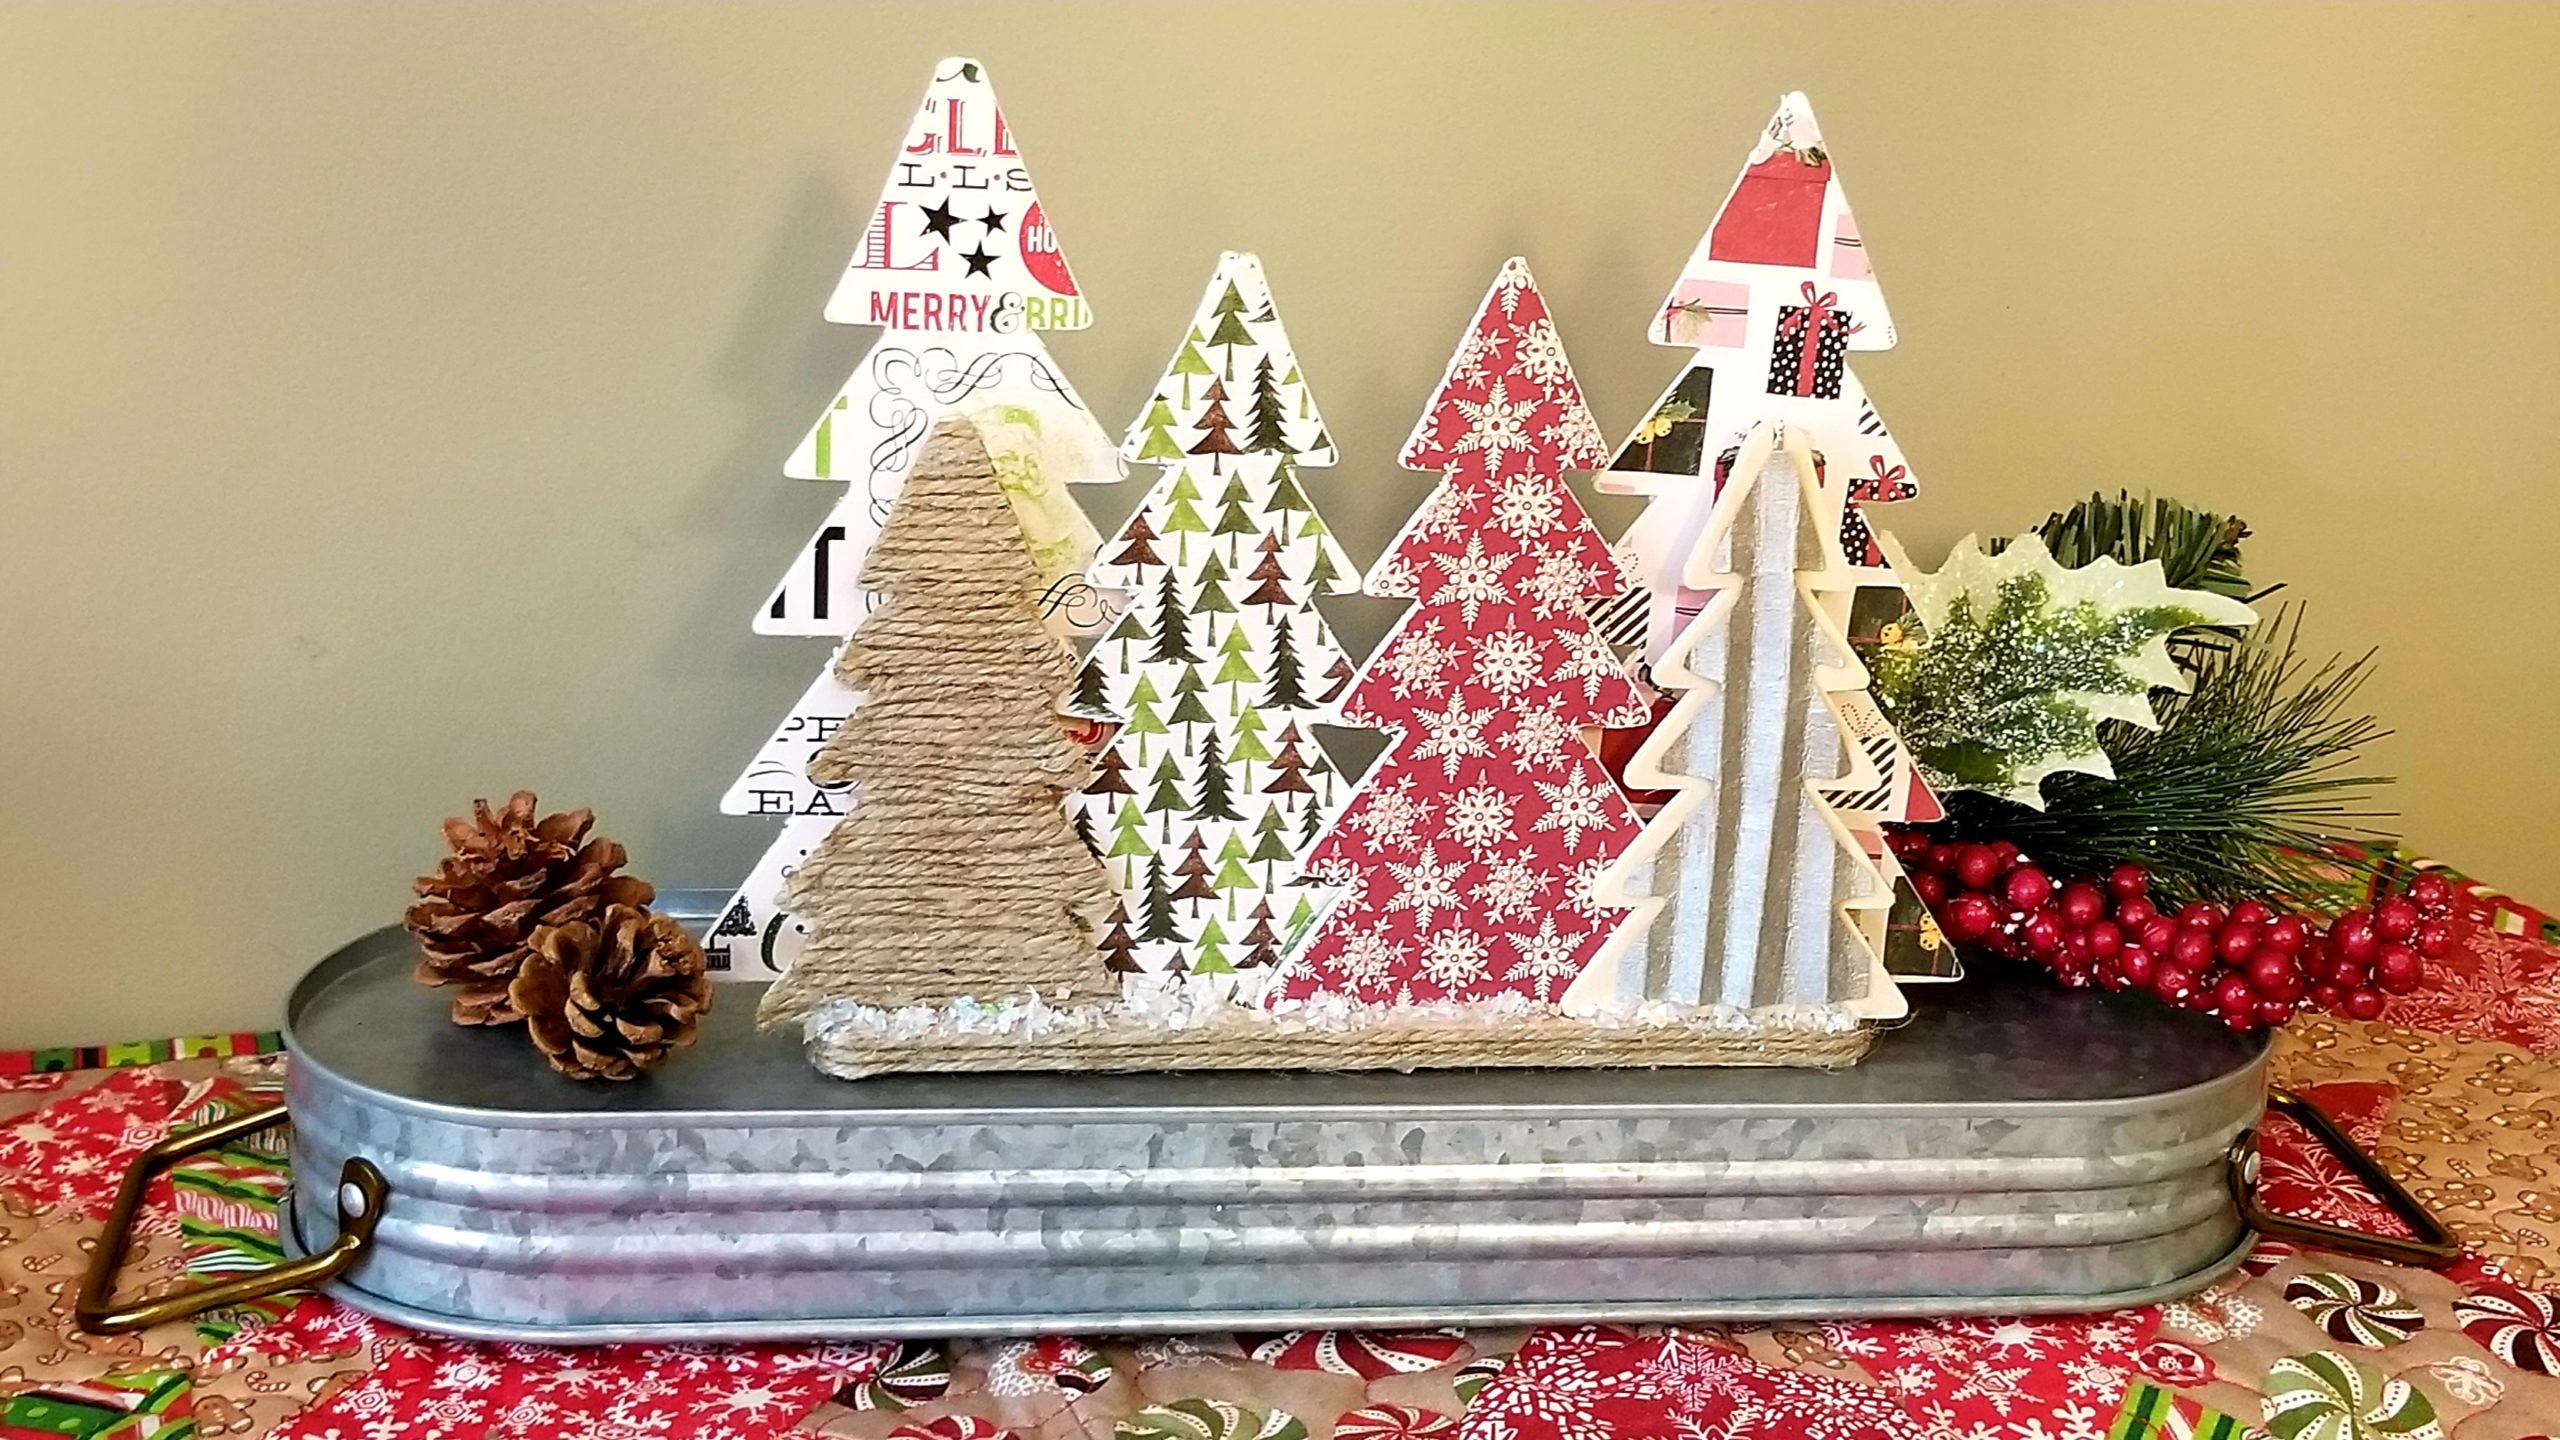
We will first work with our two large and two medium size tree cutouts. Set your two small trees aside for now. For each of the cutouts you will apply m
Mod Podge to the front of your trees. Be sure to get all the way to the edges. Now lay a piece of Christmas scrapbook paper over the top of the tree and press and rub the paper to ensure it adheres well, make it smooth, remove any air bubbles.


Once your Trees are dry you will trim any bulky excess paper away from the edges of your tree. Now you will use your sanding block to clean up your tree edges, this will give it a nice clean finished look. I used a foam nail file to get into the tight corners more easily. It may be helpful to watch the video link at the bottom of the page if you have never used this technique before.

We will now work on our first small tree. For this one I used hot glue to glue strips of twine across the tree. make sure you get your glue right to the edges. Once you have all your twine strips attached you can trim the edges with scissors


Onto your last tree. For this little tree we will use my Faux Galvanized Metal technique. Take a piece or brown card stock slightly larger then your wooden tree, paint it with the FolkArt Anniversary Silver acrylic paint. after your paint is dry you will fold the painted card stock back and forth repeatedly every 1/4 inch to give it a corrugated look. Flatten out your card stock and trace your tree. You will cut out your tree about an 1/8 of an inch inside your traced lines. You may need to fix some of your creases for your corrugated look. Apply hot glue to the high folds on the back of your painted tree and glue to your wooden tree, centering it. To watch a tutorial on this technique click here.

Now that all your trees are ready, lets create a base for your trees to stand on. To create this base you will use 4 small construction shims. You will hot glue two shims together. Glue the thin end of one on top of the thick end of another creating a level block of wood. Repeat this step with your other two shims.


You will now apply hot glue along the long edge of one of your shim blocks and stand it on top of your other shim block creating a upside down T shape. This is your base.

Your two largest trees will be glued to the back or your base overlapping the edged about 1 inch.

Your two medium trees will be hot glued to the front center of your base, overlapping each other enough to cover the base in the background.


The two small trees will be hot glued on the front edge of your base overlapping the medium trees, but also overlapping the edge of your base slightly. There will be a gap between the back of your small trees and your base. That’s OK. Set your trees leaving this gap. Once your tree is set you can put extra hot glue into this gap to secure your tree better.


You are almost done!! To finish off the base nicely I hot glued twine around the base then glued some fake snow to the exposed wood at the top of the base.

I hope you found this tutorial helpful! To watch the full video tutorial click here. For more crafts like this Follow me on Facebook by clicking here.

I Love your crafts and watching your videos
Thank you so much! ????
Loved this! ????
Thank you! ❤