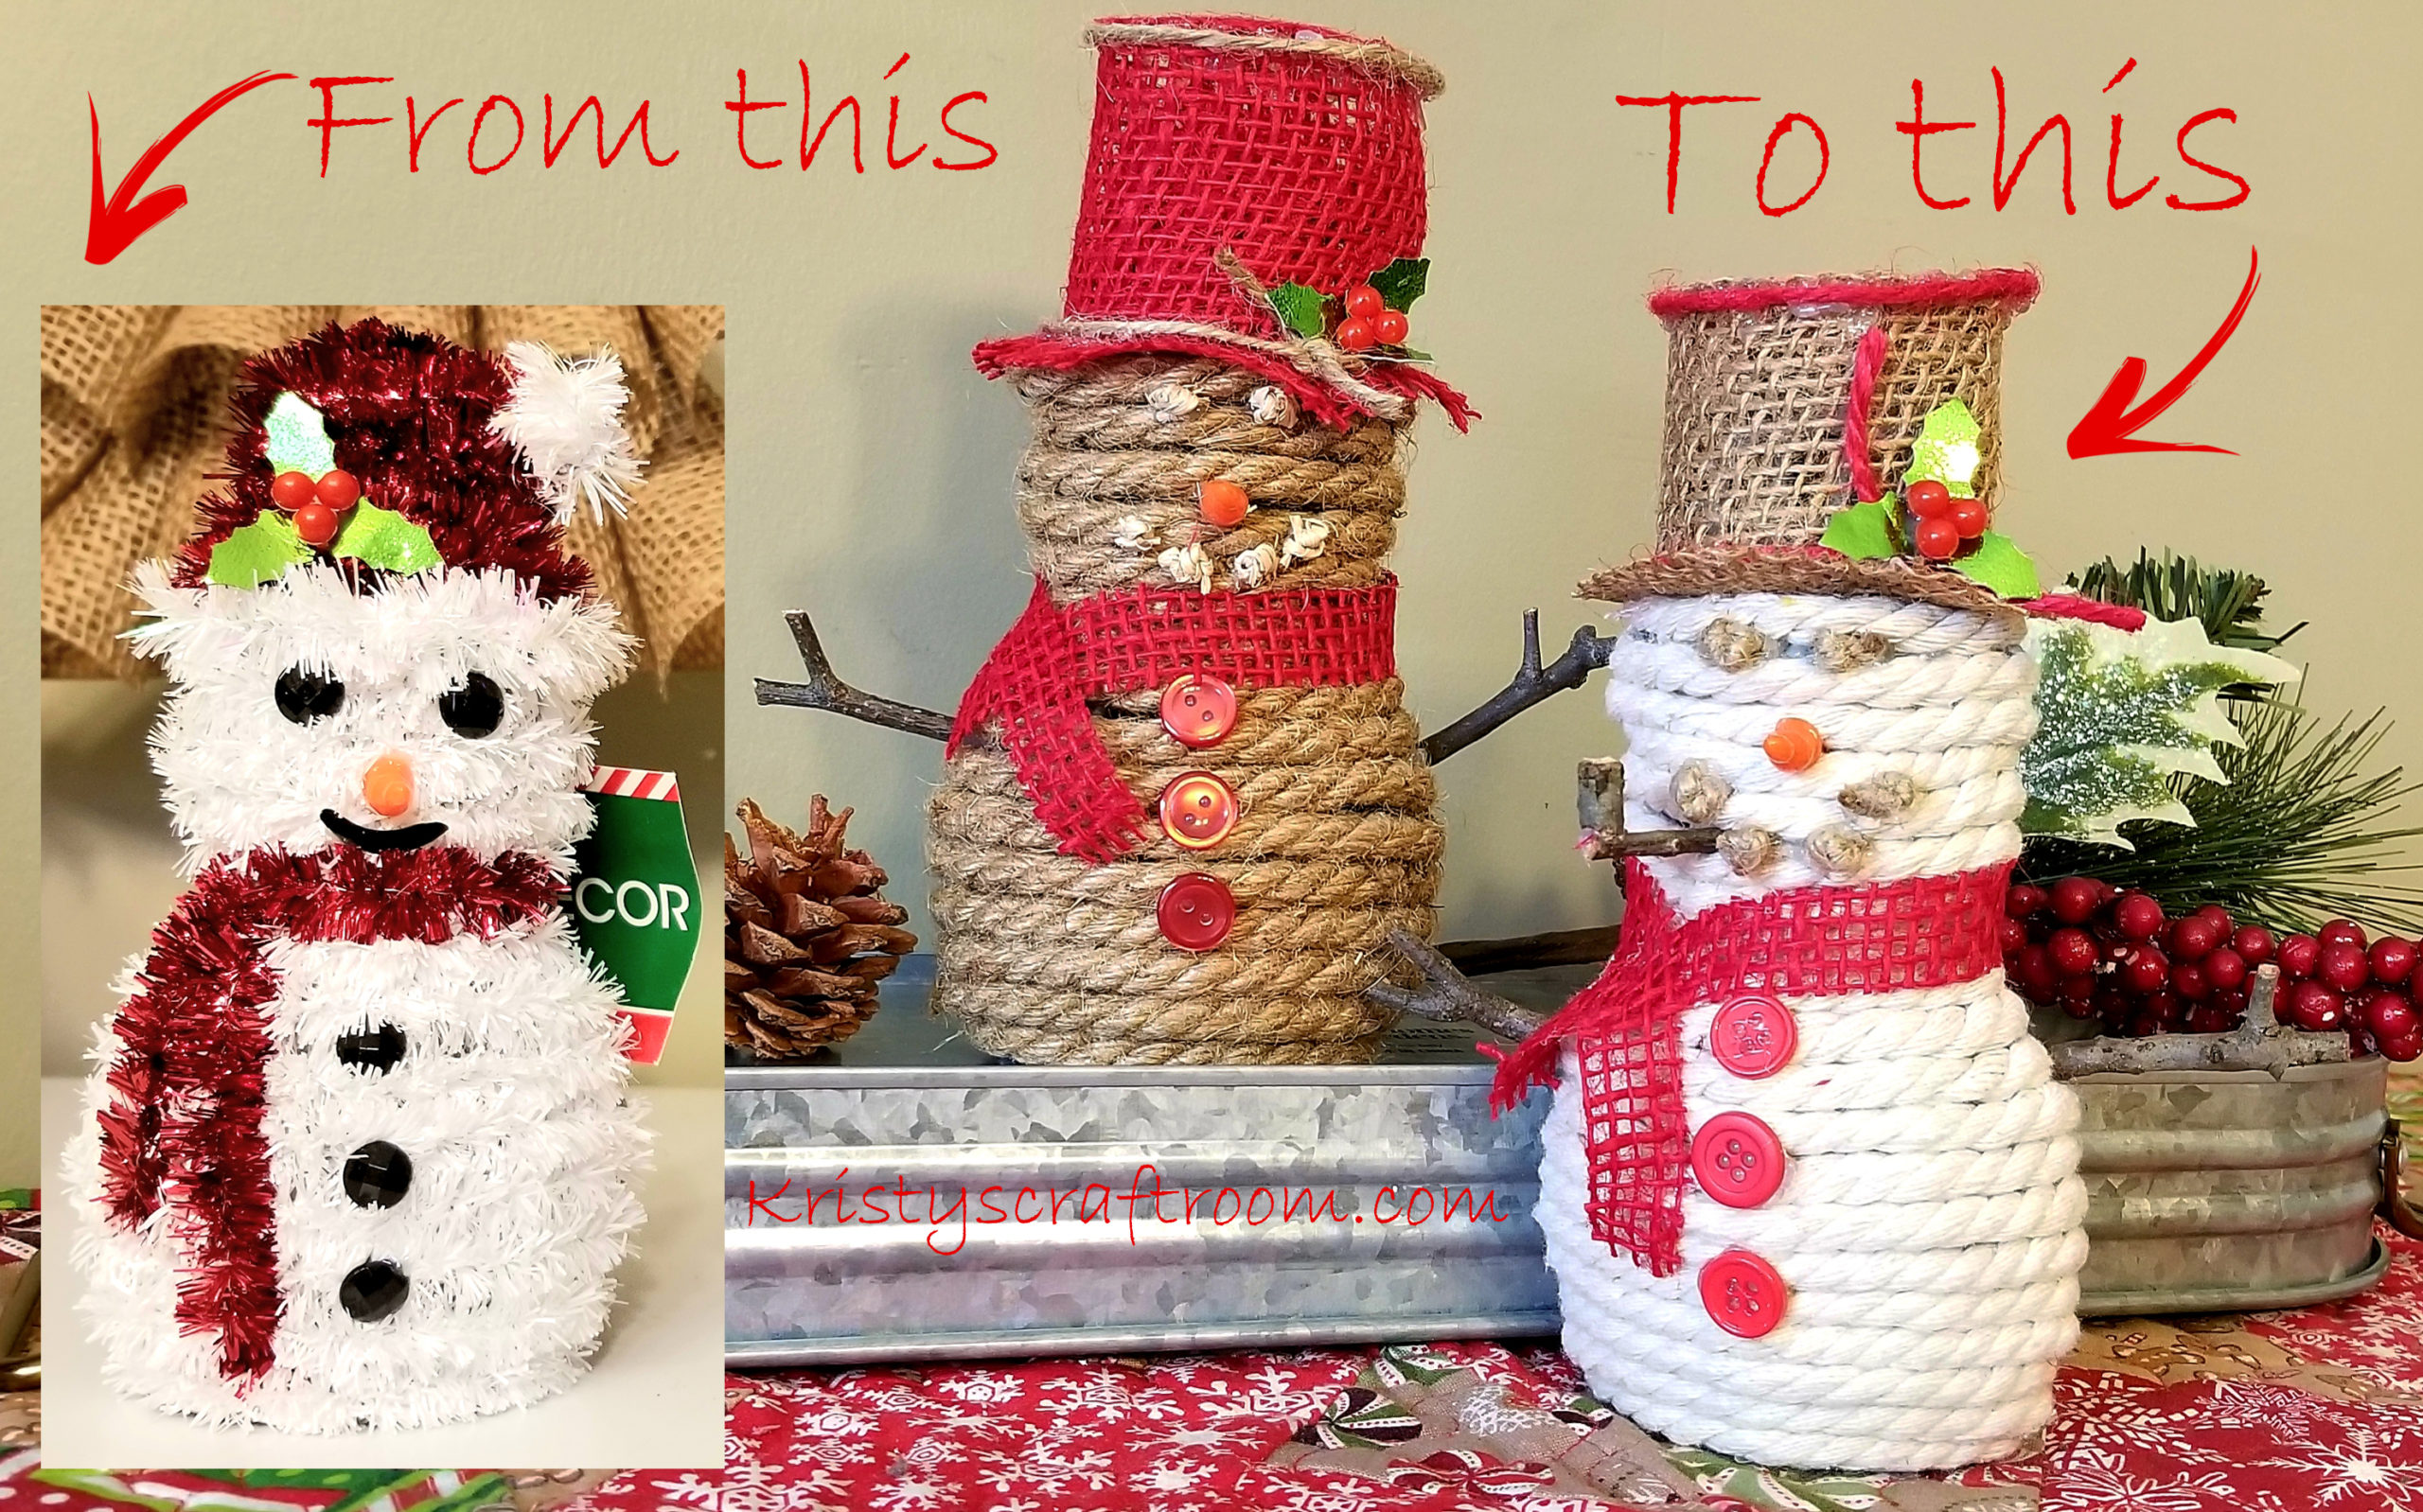
While this little Dollar Tree Snowman is cute, he’s a little flashy for my liking and doesn’t fit into my home decor. I am going to show you how you can make him over into a classy, rustic snowman you can be proud to show off in your home.
Check out the full video tutorial at the bottom of this page to get even more detailed instruction!

Here’s what you will need for this snowman makeover.
- Snowman from Dollar Tree
- Roping, cording or jute rope from Dollar Tree
- burlap ribbon from Dollar Tree
- Twine from Dollar Tree or Michael’s
- Raffia (optional) from Dollar Tree
- Buttons
- Sticks
- Hot glue gun and glue sticks
- Scissors

The first thing you will do to make over your snowman is remove the glittery garland that is wrapped around the frame of your snowman. I found the easiest way is to start from the bottom of your snowman. As you remove the garland, you will want to save the snowman’s nose and the holly/berries from his hat. Set these aside to reuse later.


After you have removed all the garland and embellishments from the snowman. You can now start wrapping your snowman with your roping. Start by securing your roping with hot glue on the bottom, backside of your snowman. You will wrap the roping around your snowman securing it with hot glue. Continue wrapping and securing your snowman all the way up to the rim of where the old hat started. Cut and secure the end of your roping with hot glue.

We will now work on our hat. The previous hat was a Santa style hat. Our new hat will be a top hat. To create this hat we will use burlap Ribbon from Dollar Tree, the color you chose will depend on the roping you chose. You will first cut a piece of ribbon about 7 inches long. You will cut the ribbon down to be about 2 inched in height.

Put a strip of hot glue along the edge of your ribbon, wrap your ribbon around securing it to other end of your ribbon to create a tube like shape.

You will now cut another piece of your burlap ribbon about 3 inches, creating a square shape. You will put hot glue around one end of your tube shaped piece of ribbon and place your square of burlap ribbon centered on the end that you glued.


Once the glue is cooled and set, you can trim your square piece into a circle shape to create the brim of your top hat.

You will also cut the center of this piece of ribbon to make the opening of the hat.


Next you will put hot glue around the other end of your tube shape and cut and place another square piece of burlap ribbon on the end. Once it has cooled and set, you will trim the ribbon close to the tube of ribbon to create the top of your top hat.

You can trim your hat with twine to dress it up and to cover any hot glue that is showing from the creation of your hat. You can also hot glue you holly/berries that you saved for the original snowman to the brim of your hat.


Now that you hat is complete you can add your snowman’s features. For the eyes and mouth you can use twine or raffia. You will triple tie knots, two for the eyes and 4 for the mouth. Be sure to pull your knots tight before cutting the ends off. You will hot glue your knots in place for the eyes ans mouth and use to carrot nose that you saved from the original snowman. Use hot glue and push it between the strips of rope on the center of the face.


To attach his hat you can trim the his original hat frame a little if needed with the side cutters. You can also wrap a scrap piece of the burlap ribbon around the hat frame to hide the frame from showing through.


For his arms I use sticks I found in my yard. I trimmed them with my side cutters. I used hot glue to secure them between two of my pieces of roping on the sides of his body.

I used some buttons that I already had from previously crafts to decorate his belly.


Finally, I thought this little guy really needed a pipe. I uses my sticks and my side cutters to cut them and I hot glued them together. To secure his pipe I used hot glue and pushed the end of the pipe between two pieces of the roping by his mouth.
Your new snowman is now complete! For more detailed and visual instructions you can watch the full video tutorial by clicking here.
I hope you found this tutorial helpful and create a beautiful snowman of your own! If you liked this tutorial and want to see more of my crafting ideas follow me on Facebook by clicking here.

