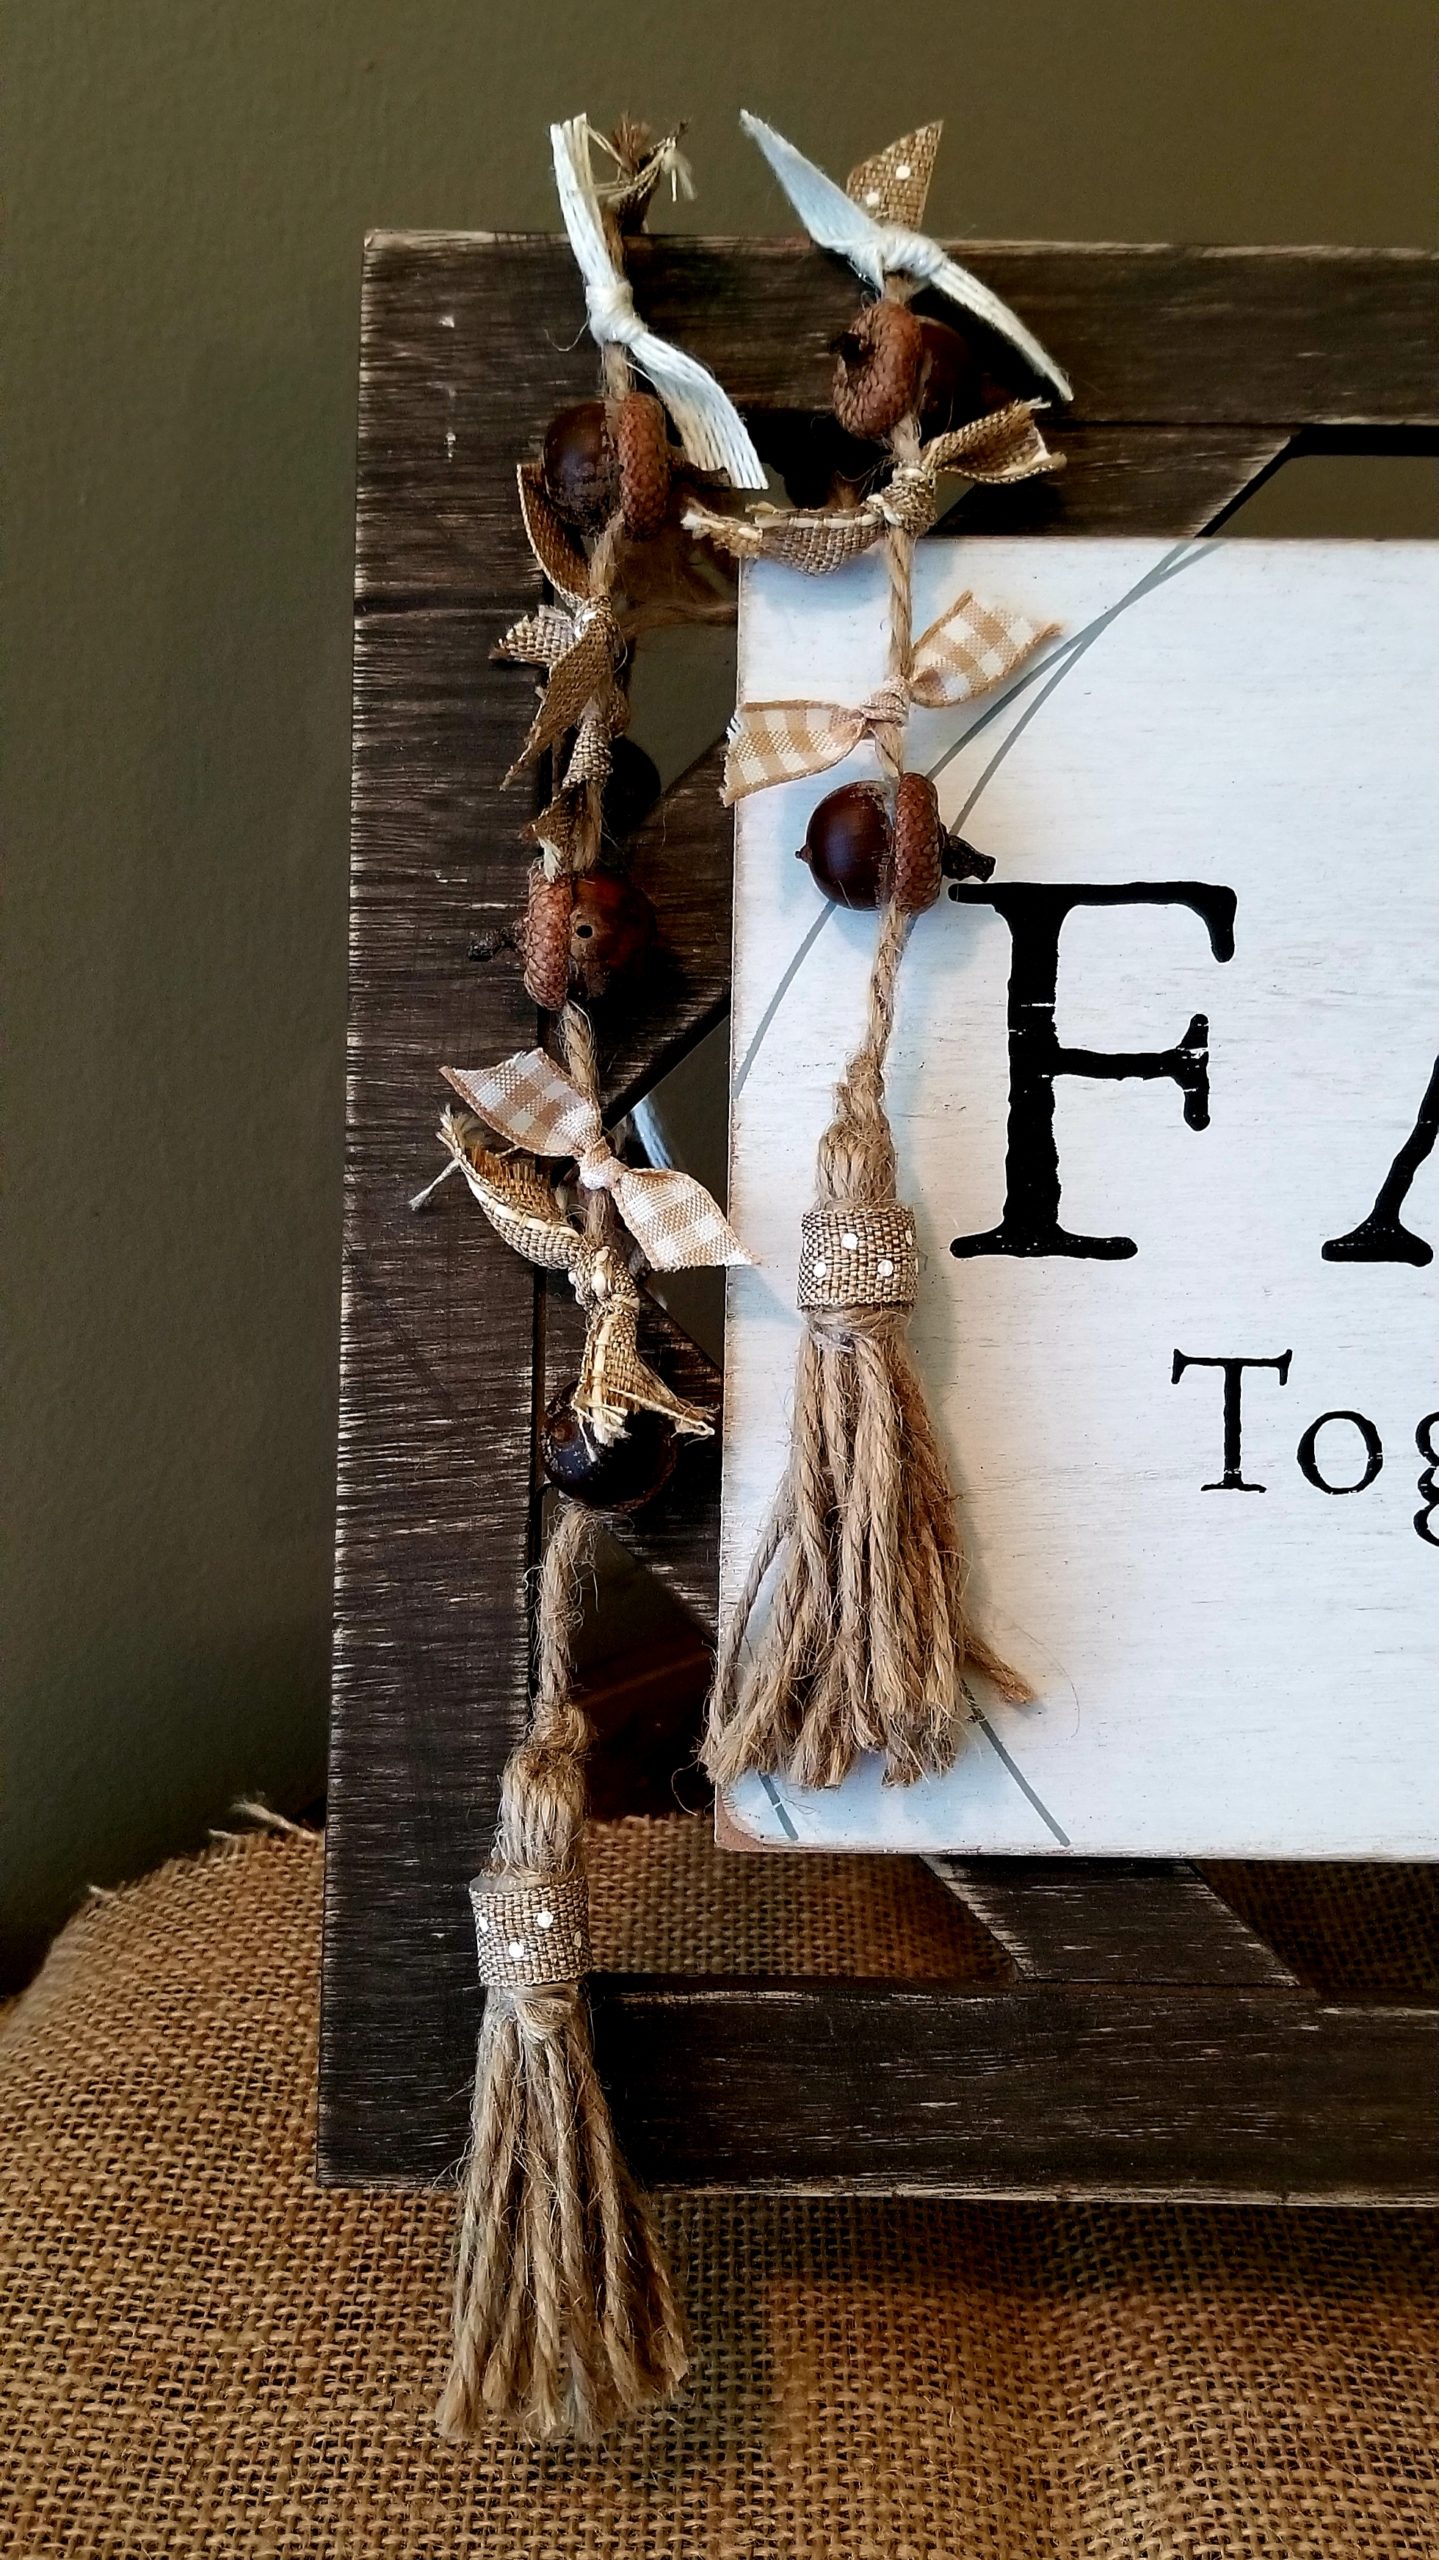
Tassels are the perfect complement to any garland! I just adore this super simple twine tassel! I used twine, but the same instructions can be used for ribbon, yarn, rope, whatever you may have on hand. You can also watch the video tutorial by clicking on the link at the bottom of the page.

Here is a list of what you will need.
- Twine
- ribbon (optional)
- Hot glue and glue sticks
- scissors
No really, that’s it! Like I said, its super simple!
First you will loop your twine back and forth to create 5 loops each 6″ long. You can add more loops if you want a thicker tassel.

If you are making a solo tassel you will need a piece of twine about 9″ long to tie your loops. If you are adding this tassel to a garland, you can tie the garland around the center of your loops.


You will now fold your loops in half so all your loops are at one end.

cut another piece of twine about 9″ to tie around your loops, about .5″ from the top. Make sure to leave one end longer then the other. Trim off your short end.

OK, here’s where the hot glue comes into play. You will wrap your long end of your twine around your tassel loops, hot gluing it along the way.

Now you can cut all your loops.

Your loops may not have all been even so you will want to trim the end of your tassel.

This step is completely optional, You can leave your tassel as is or you can add a piece of decorative ribbon to finish it off. You will need a little over 2″ of ribbon. Hot glue the ribbon over top of where you wrapped your long piece of twine around your tassel.

Your tassel is now complete! You can watch the video tutorial here. If you like the Fall Harvest Acorn Garland shown in the photos you can read that blog post here or watch the video tutorial here.

Thank you for taking the time to check out his fun craft. I’d love if you left a comment letting me know what you think about it!
I love it…simple but effective!!!
Thank you for your feedback. I really appreciate it!